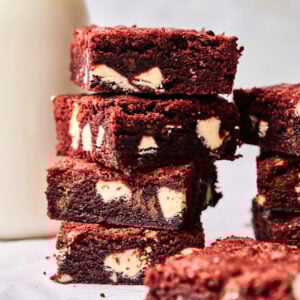
Red Velvet Brownies
These red velvet brownies bring together the best parts of red velvet cake and brownies: moist, chocolatey, and full of bold red color. They’re easy to make with simple ingredients and always a hit, whether it’s Valentine’s Day or just a regular Tuesday that needs dessert. I like how the mix of regular and white chocolate gives each bite a little something extra.
Equipment
Ingredients
- ¾ cup butter slightly melted
- 1 ¼ cups sugar
- 2 eggs
- 1 teaspoon vanilla extract
- 1 ½ cups all-purpose wheat flour
- 3 tablespoons cocoa powder
- ¼ teaspoon salt
- 1 teaspoon gel red food coloring special for bakery
- ⅔ cup chocolate chips
- ⅔ cup white chocolate chunks
Instructions
- Preheat your oven to 350°F (180°C). Line an 8×8-inch baking pan with parchment paper, leaving some overhang for easy lifting later.
- In a large mixing bowl, beat the melted butter and sugar together for about 1 minute, until creamy and well blended. Add the eggs and vanilla extract and stir until smooth.¾ cup butter, 1 ¼ cups sugar, 2 eggs, 1 teaspoon vanilla extract
- Sift in the flour, cocoa powder, and salt. Mix gently until just combined and no streaks of flour remain.1 ½ cups all-purpose wheat flour, 3 tablespoons cocoa powder, ¼ teaspoon salt
- Stir in the red gel food coloring until you achieve your desired shade of red. Fold in the chocolate chips and white chocolate chunks.1 teaspoon gel red food coloring, ⅔ cup chocolate chips, ⅔ cup white chocolate chunks
- Pour the batter into your prepared baking pan and spread it into an even layer. Bake for 20–25 minutes, or until a toothpick inserted in the center comes out with only a few moist crumbs.
- Allow the brownies to cool in the pan for about 10 minutes. Then, lift them out using the parchment paper and transfer to a wire rack to cool completely. Cut into 16 squares and enjoy!
Video
[adthrive-in-post-video-player video-id="XenqtxWl" upload-date="2025-12-26T00:55:04+00:00" name="Best Red Velvet Brownies Recipe" description="The best red velvet brownies recipe you’ll bake on repeat." player-type="default" override-embed="default"]
Notes
- Butter: Use slightly melted, not hot, butter so your batter mixes smoothly without scrambling the eggs.
- Unsweetened cocoa powder: Dutch-processed cocoa powder gives a smoother chocolate flavor and deeper color, but natural cocoa powder works too.
- Color: Gel food coloring gives a richer red without watering down your batter like liquid food dye. If you use red liquid food coloring, you may need to add more than the recipe calls for.
- Mix-ins: If you’re out of white chocolate chunks, chopped white chocolate bars, white chocolate chips, or extra chocolate chips work too.
- Don’t skip the parchment: It makes lifting the brownies out of the pan way easier and keeps them from sticking.
- Check with a toothpick: Look for a few moist crumbs, not raw batter. That’s your sign they’re fudgy and done.
- Cool before slicing: It’s tempting to cut in early, but waiting gives you cleaner cuts and keeps the fudgy brownie texture.
- Cheesecake swirl: Add dollops of sweetened cream cheese on top and swirl before baking to make red velvet cheesecake brownies.
- Frosting: A layer of cream cheese frosting on top takes these to dessert heaven, but they’re great plain too.
Storage and Reheating Instructions
- Room temperature: Once the brownies are completely cool, store them in an airtight container at room temperature for up to 3 days.
- Fridge: If you want to keep them fresh longer, pop them in the fridge for up to a week.
- Freeze: You can also freeze them—just wrap each square in parchment and store in a freezer-safe bag for up to 2 months.
- Reheat: A quick 10–15 seconds in the microwave brings them right back to fudgy goodness.
Nutrition
Calories: 268kcalCarbohydrates: 34gProtein: 3gFat: 14gSaturated Fat: 9gPolyunsaturated Fat: 1gMonounsaturated Fat: 3gTrans Fat: 0.4gCholesterol: 45mgSodium: 120mgPotassium: 81mgFiber: 1gSugar: 24gVitamin A: 298IUVitamin C: 0.04mgCalcium: 29mgIron: 1mg
Tried this recipe?Let us know how it was!