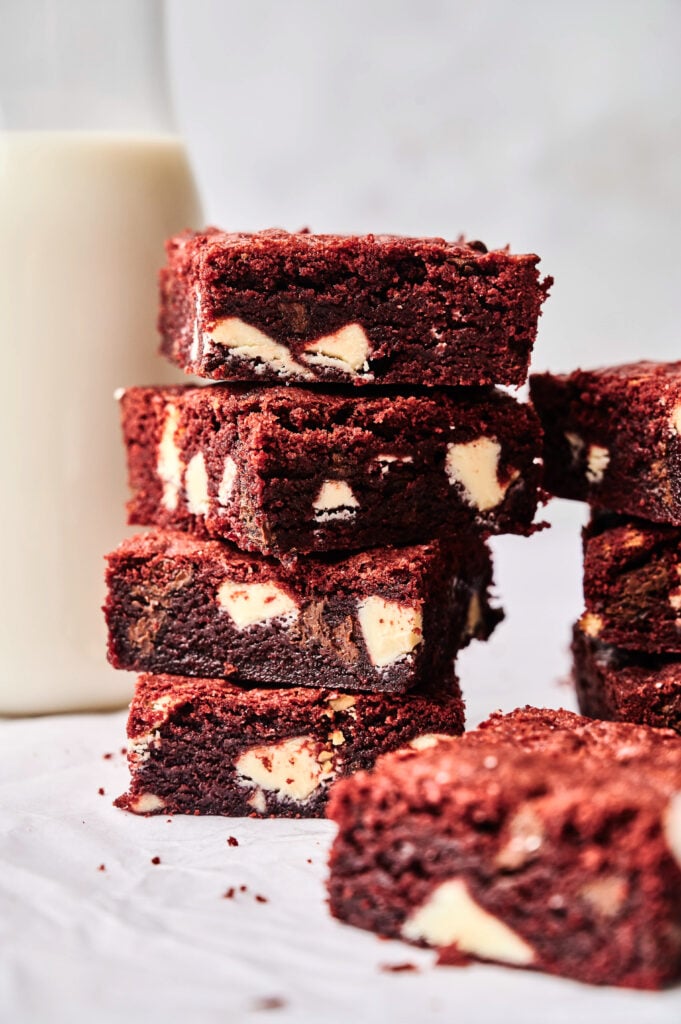
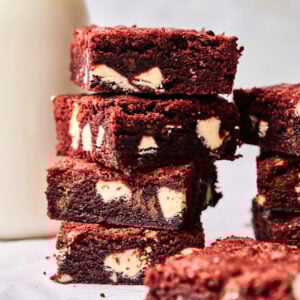
These Red Velvet Brownies bring together the best parts of red velvet cake and brownies: moist, chocolatey, and full of bold red color. They’re easy to make with simple ingredients and always a hit, whether it’s Valentine’s Day or just a regular Tuesday that needs dessert. I like how the mix of regular and white chocolate gives each bite a little something extra.
This post contains affiliate links. As an Amazon Affiliate, if you purchase through those links, I earn a small commission. Thank you!
I’ve made these brownies for birthdays, dinner parties, and quiet nights at home and somehow, they always disappear fast. The fudgy texture is spot-on, and the red velvet flavor really comes through thanks to the cocoa and food coloring. I also like that they don’t need any frosting, though cream cheese icing doesn’t hurt if you want to take things up a notch. They’re easy enough for a weekday bake but special enough for celebrations.
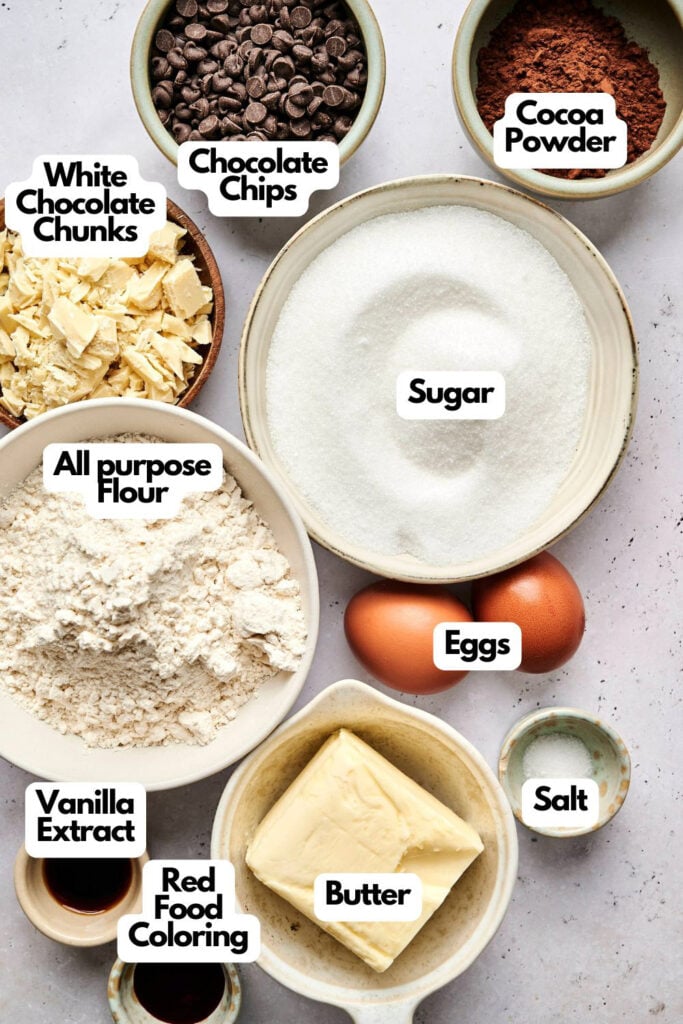
Ingredients You’ll Need
You’ll need all the ingredients shown in the photograph below.
How to Make Red Velvet Brownies
Scroll down for the full recipe card containing a full printable recipe and measurements in both US customary and metric units.
I like to keep things simple when baking, and these red velvet brownies are just that. Here’s how I make them step by step:
Preheat and prep your pan
Start by preheating your oven to 350°F (180°C). Line an 8×8-inch baking pan with parchment paper, letting a bit hang over the sides so you can lift the brownies out easily once they’re baked. I use these pre-cut sheets, made for square pans, which require way less wrestling than tearing off a roll.
Mix the wet ingredients
In a large bowl, beat together the slightly melted butter and sugar until smooth and creamy, about 1 minute. Add the eggs and vanilla extract, and whisk until the mixture looks smooth and glossy. I use this electric hand mixer that’s strong enough to whip through cold butter but still light to hold. Add the eggs and vanilla extract, and whisk until the mixture looks smooth and glossy.
SERIOUSLY GOOD
DESSERTS!
Dessert First is a collection of 61 RECIPES to show you that you can make beautiful, impressive desserts right in your own kitchen, no matter your skill level.
Immediate eBook download. No physical book available.
Includes ad-free recipes like:
∙ Lemon Pound Cake
∙ Starbucks Cake Pops
∙ Boston Cream Pie
∙ Chocolate Mousse
∙ Matcha Tiramisu
...and much more!

Add the dry ingredients
Sift in the all-purpose flour, cocoa powder, and salt. Stir gently until just combined. I found this handled flour sifter to be super easy to crank, with no powder explosion. Don’t overmix, stop as soon as you no longer see streaks of flour.
Add color and chocolate
Mix in the red gel food coloring until the brownie batter turns a deep red color. Then fold in the chocolate chips and white chocolate chunks using a silicone spatula that actually scrapes the bowl clean, rather than just bending around like a spoon.
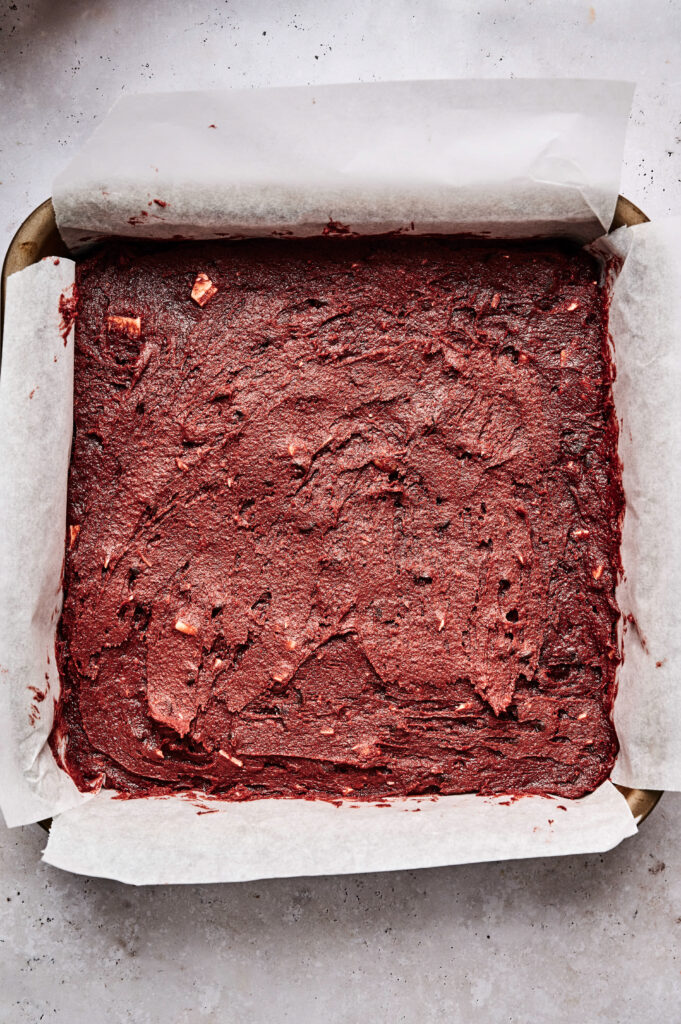
Bake the brownies
Pour the batter into the prepared baking pan and spread it into an even layer. Bake for 20–25 minutes, or until a toothpick poked in the center comes out with a few moist crumbs.
Cool and slice
Let the brownies cool in the pan for about 10 minutes. Then lift them out using the parchment paper and transfer to a wire rack to cool completely. Once cooled, slice into 16 squares with a sharp chef’s knife that doesn’t tear the brownies apart when you hit a chocolate chunk and enjoy!
Red Velvet Brownies
Equipment
Ingredients
- ¾ cup butter slightly melted
- 1 ¼ cups sugar
- 2 eggs
- 1 teaspoon vanilla extract
- 1 ½ cups all-purpose wheat flour
- 3 tablespoons cocoa powder
- ¼ teaspoon salt
- 1 teaspoon gel red food coloring special for bakery
- ⅔ cup chocolate chips
- ⅔ cup white chocolate chunks
Instructions
- Preheat your oven to 350°F (180°C). Line an 8×8-inch baking pan with parchment paper, leaving some overhang for easy lifting later.
- In a large mixing bowl, beat the melted butter and sugar together for about 1 minute, until creamy and well blended. Add the eggs and vanilla extract and stir until smooth.¾ cup butter, 1 ¼ cups sugar, 2 eggs, 1 teaspoon vanilla extract
- Sift in the flour, cocoa powder, and salt. Mix gently until just combined and no streaks of flour remain.1 ½ cups all-purpose wheat flour, 3 tablespoons cocoa powder, ¼ teaspoon salt
- Stir in the red gel food coloring until you achieve your desired shade of red. Fold in the chocolate chips and white chocolate chunks.1 teaspoon gel red food coloring, ⅔ cup chocolate chips, ⅔ cup white chocolate chunks
- Pour the batter into your prepared baking pan and spread it into an even layer. Bake for 20–25 minutes, or until a toothpick inserted in the center comes out with only a few moist crumbs.
- Allow the brownies to cool in the pan for about 10 minutes. Then, lift them out using the parchment paper and transfer to a wire rack to cool completely. Cut into 16 squares and enjoy!
Video
Notes
- Butter: Use slightly melted, not hot, butter so your batter mixes smoothly without scrambling the eggs.
- Unsweetened cocoa powder: Dutch-processed cocoa powder gives a smoother chocolate flavor and deeper color, but natural cocoa powder works too.
- Color: Gel food coloring gives a richer red without watering down your batter like liquid food dye. If you use red liquid food coloring, you may need to add more than the recipe calls for.
- Mix-ins: If you’re out of white chocolate chunks, chopped white chocolate bars, white chocolate chips, or extra chocolate chips work too.
- Don’t skip the parchment: It makes lifting the brownies out of the pan way easier and keeps them from sticking.
- Check with a toothpick: Look for a few moist crumbs, not raw batter. That’s your sign they’re fudgy and done.
- Cool before slicing: It’s tempting to cut in early, but waiting gives you cleaner cuts and keeps the fudgy brownie texture.
- Cheesecake swirl: Add dollops of sweetened cream cheese on top and swirl before baking to make red velvet cheesecake brownies.
- Frosting: A layer of cream cheese frosting on top takes these to dessert heaven, but they’re great plain too.
Storage and Reheating Instructions
- Room temperature: Once the brownies are completely cool, store them in an airtight container at room temperature for up to 3 days.
- Fridge: If you want to keep them fresh longer, pop them in the fridge for up to a week.
- Freeze: You can also freeze them—just wrap each square in parchment and store in a freezer-safe bag for up to 2 months.
- Reheat: A quick 10–15 seconds in the microwave brings them right back to fudgy goodness.
Nutrition
SERIOUSLY GOOD
DESSERTS!
Dessert First is a collection of 61 RECIPES to show you that you can make beautiful, impressive desserts right in your own kitchen, no matter your skill level.
Immediate eBook download. No physical book available.
Includes ad-free recipes like:
∙ Lemon Pound Cake
∙ Starbucks Cake Pops
∙ Boston Cream Pie
∙ Chocolate Mousse
∙ Matcha Tiramisu
...and much more!
Recipe Notes and Tips
I’ve picked up a few tricks along the way that help this easy brownie recipe turn out just right every time:
- Butter: Use slightly melted, not hot, butter so your batter mixes smoothly without scrambling the eggs.
- Unsweetened cocoa powder: Dutch-processed cocoa powder gives a smoother chocolate flavor and deeper color, but natural cocoa powder works too.
- Color: Gel food coloring gives a richer red without watering down your batter like liquid food dye. If you use red liquid food coloring, you may need to add more than the recipe calls for.
- Mix-ins: If you’re out of white chocolate chunks, chopped white chocolate bars, white chocolate chips, or extra chocolate chips work too.
- Don’t skip the parchment: It makes lifting the brownies out of the pan way easier and keeps them from sticking.
- Check with a toothpick: Look for a few moist crumbs, not raw batter. That’s your sign they’re fudgy and done.
- Cool before slicing: It’s tempting to cut in early, but waiting gives you cleaner cuts and keeps the fudgy brownie texture.
- Cheesecake swirl: Add dollops of sweetened cream cheese on top and swirl before baking to make red velvet cheesecake brownies.
- Frosting: A layer of cream cheese frosting on top takes these to dessert heaven, but they’re great plain too.
How to Store Leftover Red Velvet Brownies
Once the brownies are completely cool, store them in an airtight container at room temperature for up to 3 days. If you want to keep them fresh longer, pop them in the fridge for up to a week.
You can also freeze them—just wrap each square in parchment and store in a freezer-safe bag for up to 2 months. A quick 10–15 seconds in the microwave brings them right back to fudgy goodness.
What to Serve With This Red Velvet Brownie Recipe
These brownies are rich on their own, but they’re even better with a scoop of vanilla ice cream or a drizzle of warm chocolate sauce.
For something lighter, serve them with fresh berries or a dollop of whipped cream. If you’re feeling adventurous, stack a few with cream cheese frosting in between for a mini red velvet brownie cake.
More Dessert Recipes You Will Love
If these red velvet brownies hit the spot, I’ve got more simple treats for you to try next: