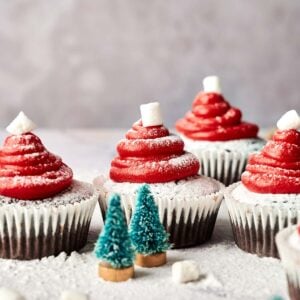
Santa Cupcakes are perfect when I want to impress at holiday parties without the stress. They look fancy but come together quickly into adorable chocolate treats. That red frosting hat sits on moist chocolate cake, and the cream cheese tang cuts right through the sweetness. You’ll find guests sneaking back to the dessert table for one more.

This post contains affiliate links. As an Amazon Affiliate, if you purchase through those links, I earn a commission. Thank you!
I bake them every December for Christmas parties, potlucks, and bake sales because this dessert impresses the crowd every time. Kids adore the Santa hat design while adults love the tangy cream cheese frosting that’s not too sweet. They’ll stay fresh at room temperature for about 2 days, in the fridge for a week, or frozen for up to 3 months.
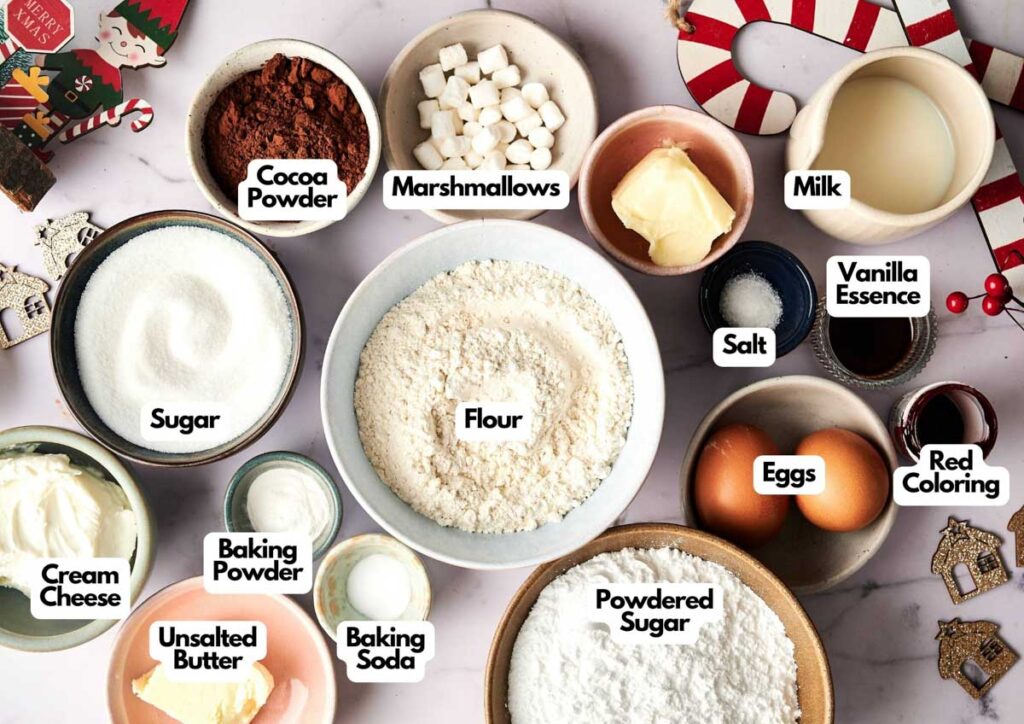
Ingredients You’ll Need
You’ll need all the ingredients shown in the photograph below.
How to Make Santa Cupcakes with Step-By-Step Instructions
Scroll down for the full recipe card containing a full printable recipe and measurements in both US customary and metric units.
I’ll walk you through exactly how to make these festive cupcakes from start to finish.
Prep Your Oven and Pan
Preheat your oven to 350°F (180°C) and line a cupcake pan with paper liners. I love using these cupcake liners because they don’t lose their shape or get greasy after baking.
Mix the Dry Ingredients
In a large bowl, whisk the flour, cocoa powder, sugar, baking powder, baking soda, and salt until evenly combined. This helps the cocoa blend smoothly so every cupcake turns out rich and chocolatey.
Combine the Wet Ingredients
In a separate bowl, beat the butter, eggs, milk, and vanilla extract until the mixture’s smooth and creamy. I use my KitchenAid Stand Mixer for this because it makes the process effortless, but a hand mixer works great too.
Bring the Batter Together
Slowly add the dry ingredients to the wet mixture, alternating with water, and mix just until smooth. Avoid overmixing to keep the cupcakes light and tender.
SERIOUSLY GOOD
DESSERTS!
Dessert First is a collection of 61 RECIPES to show you that you can make beautiful, impressive desserts right in your own kitchen, no matter your skill level.
Immediate eBook download. No physical book available.
Includes ad-free recipes like:
∙ Lemon Pound Cake
∙ Starbucks Cake Pops
∙ Boston Cream Pie
∙ Chocolate Mousse
∙ Matcha Tiramisu
...and much more!

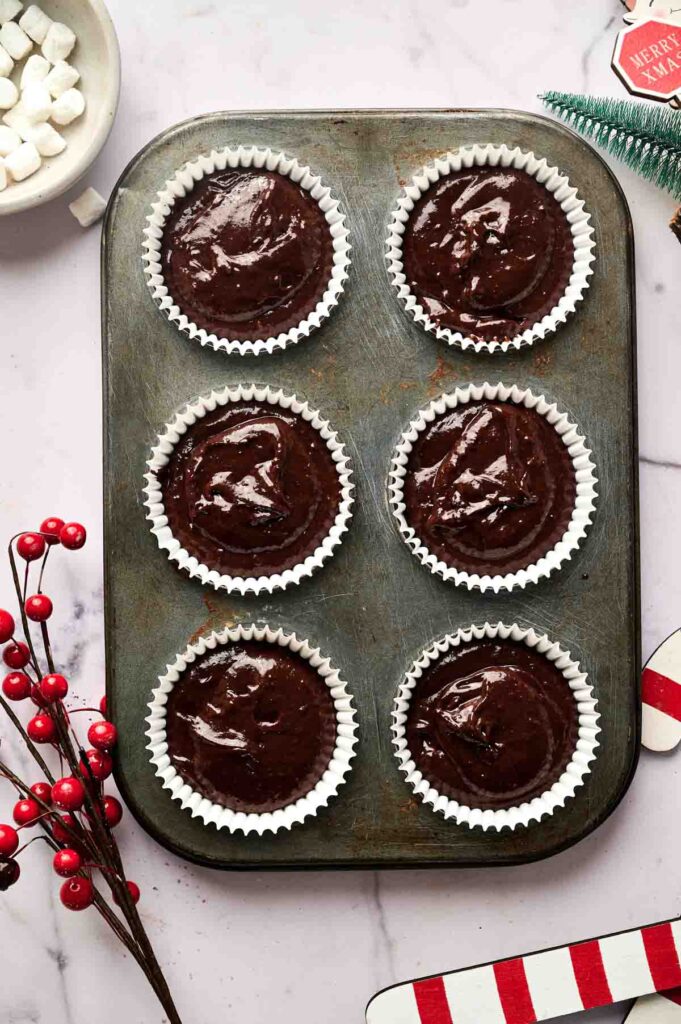
Fill and Bake
Fill each cupcake liner about two-thirds full using a medium cookie scoop for even portions. Bake for 12–15 minutes, or until a toothpick inserted in the center comes out clean.
Let the cupcakes cool in the pan for 5 minutes, then transfer to a nonstick cooling rack to set completely. Make sure they’re fully cooled, or the cream cheese frosting will melt.
Make the Cream Cheese Frosting
In a bowl, beat the butter and cream cheese until smooth and creamy. Then gradually add the powdered sugar and mix until light and fluffy to create a smoother, lump-free frosting.
Divide the frosting into two portions and tint one portion red using red food coloring, leaving the other portion white. I prefer using gel food coloring because it creates vibrant red without making the frosting watery like liquid food coloring can.
Pipe the Santa Hats
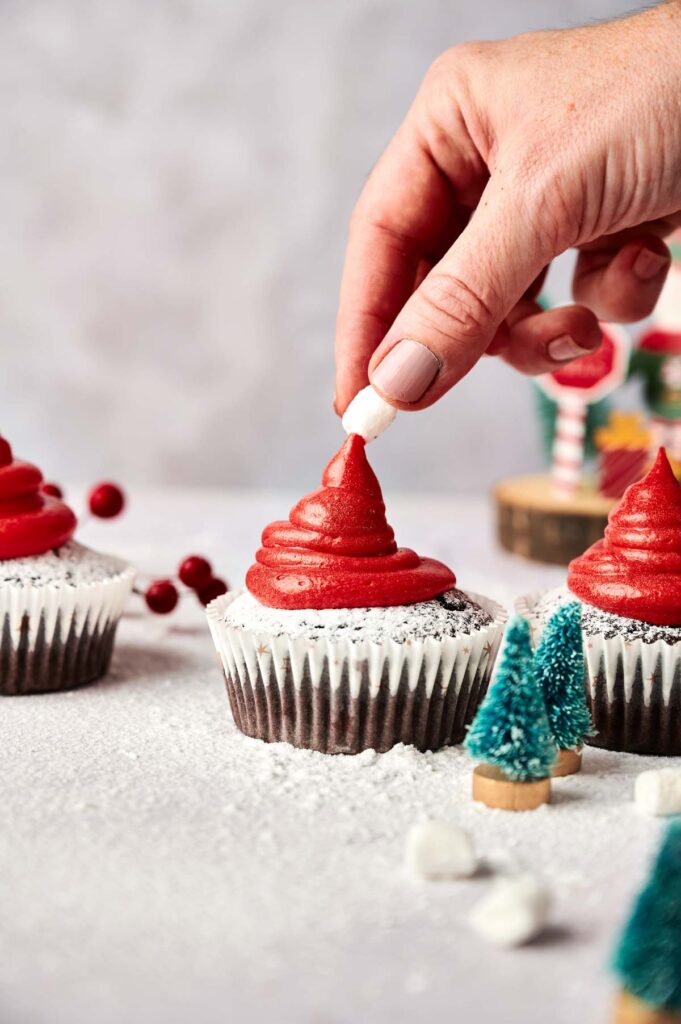
Fill two piping bags with the red and white frosting. Pipe the red frosting into a tall cone on each cupcake to form the Santa hat. To finish the trim, either dust powdered sugar around the base for a snowy effect or pipe a simple white border for the classic look. These reusable piping bags work perfectly here because they’re easy to grip, mess-free, and make perfectly smooth frosting every time.
Top each cupcake with a mini marshmallow to look like Santa’s hat pom-pom. Don’t worry if your piping isn’t perfect; even slightly uneven hats still look cute and festive. Serve and let the party begin!
Transport Tip
Chill Santa Cupcakes for 20–30 minutes before traveling to help the frosting set. Place them in a cupcake carrier or bakery box to keep them secure, and avoid heat or rough handling to prevent tipping or melting.
Santa Cupcakes
Ingredients
For the cupcakes:
- 1 ½ cups all-purpose flour
- 1 cup granulated sugar
- ½ cup cocoa powder
- 1 teaspoon baking powder
- ½ teaspoon baking soda
- ¼ teaspoon salt
- ½ cup unsalted butter softened
- 2 large eggs room temperature
- 1 teaspoon vanilla extract
- ½ cup milk
- ¼ cup water
For the frosting:
- ¼ cup unsalted butter softened
- 4 ounces cream cheese softened
- 2 cups powdered sugar
- Red food coloring
- Small marshmallows for decoration
Instructions
- Preheat the oven to 350°F (180°C) and line a cupcake pan with paper liners.
- In a large bowl, whisk together the flour, cocoa powder, sugar, baking powder, baking soda, and salt until well combined.1 ½ cups all-purpose flour, 1 cup granulated sugar, ½ cup cocoa powder, 1 teaspoon baking powder, ½ teaspoon baking soda, ¼ teaspoon salt
- In a separate bowl, beat the butter, eggs, milk, and vanilla extract until smooth and creamy.½ cup unsalted butter, 2 large eggs, 1 teaspoon vanilla extract, ½ cup milk
- Gradually add the dry ingredients to the wet mixture, alternating with water, and mix gently until just combined. Avoid overmixing.¼ cup water
- Fill each cupcake liner about two-thirds full with batter.
- Bake for 12–15 minutes, or until a toothpick inserted in the center comes out clean. Let the cupcakes cool in the pan for 5 minutes, then transfer to a wire rack to cool completely before frosting.
To Decorate (Santa Hats):
- In a bowl, beat together the butter and cream cheese until smooth and creamy. Gradually add the powdered sugar and beat until fluffy.¼ cup unsalted butter, 4 ounces cream cheese, 2 cups powdered sugar
- Divide the frosting into two portions. Tint one portion red using red food coloring, leaving the other portion white.Red food coloring
- Fill two piping bags—one with red frosting and one with white. Pipe the red frosting onto each cupcake in the shape of a Santa hat (a tall cone). Use the white frosting to pipe around the base of the hat for the trim.
- Finish each cupcake by placing a mini marshmallow on top to resemble the pom-pom of Santa’s hat.Small marshmallows
Video
Notes
- Don’t overmix the batter: Mix just until combined to keep the cupcakes light and tender, not dense.
- Cool completely before frosting: Let the cupcakes cool completely on a wire rack, or the frosting will melt right off.
- Use gel food coloring: Gel gives a rich red color without adding extra liquid that can make the frosting runny.
- Two piping bags save time: Having one bag for red and another for white frosting lets you decorate nonstop without pausing to clean or switch.
- Pipe in a cone motion: Start at the center of the cupcake and pipe upward in a circular motion to create the classic Santa hat shape naturally.
- Flash freeze before stacking: Freeze the decorated cupcakes on a baking sheet for an hour first so the frosting stays intact before storing them in containers.
Nutrition
SERIOUSLY GOOD
DESSERTS!
Dessert First is a collection of 61 RECIPES to show you that you can make beautiful, impressive desserts right in your own kitchen, no matter your skill level.
Immediate eBook download. No physical book available.
Includes ad-free recipes like:
∙ Lemon Pound Cake
∙ Starbucks Cake Pops
∙ Boston Cream Pie
∙ Chocolate Mousse
∙ Matcha Tiramisu
...and much more!
How to Store Leftovers
These cupcakes stay soft and moist at room temperature for about 2 days when stored in an airtight container. Keep them in a cool spot away from direct sunlight so the frosting doesn’t get too soft.
For longer storage, freeze the frosted cupcakes in a single layer until solid, then transfer them to freezer-safe containers. Let them thaw at room temperature for about an hour to keep the texture soft and the frosting looking perfect.
What to Serve With Santa Cupcakes
I serve them with hot chocolate, candy cane fudge, or sugar cookies at Christmas parties. They’re also great alongside eggnog, peppermint bark, or gingerbread cookies for a full holiday dessert table. Kids love them with cold milk, and honestly, so do adults. The chocolate and tangy cream cheese combo is rich enough to satisfy but light enough that you can enjoy other treats too.
More Easy Recipes for You to Try at Home
I’ve got other Christmas treats that are just as cute, way easier than they look, and perfect for holiday gift giving.