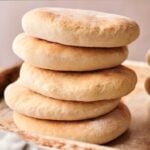
I’m very particular about how I want my Pita Bread; I want it soft, fluffy, and golden with a chewy bite, and the packaged versions just don’t cut it, which is why I rely on this recipe. Unlike store-bought, it gives you warm pitas fresh from the oven, and with a simple baking trick I’ve found, you still get their signature puff without any fuss.

This post contains affiliate links. As an Amazon Affiliate, if you purchase through those links, I earn a commission. Thank you!
Pita bread has become such a staple in my kitchen. It fits easily into almost any occasion, from busy weeknight dinners to game day snacks and even summer potlucks. I love that I can bake them in batches, serve some warm at the table, and store or freeze the extras for later. Just reheat them, and you’ll have their fresh-baked taste all over again.
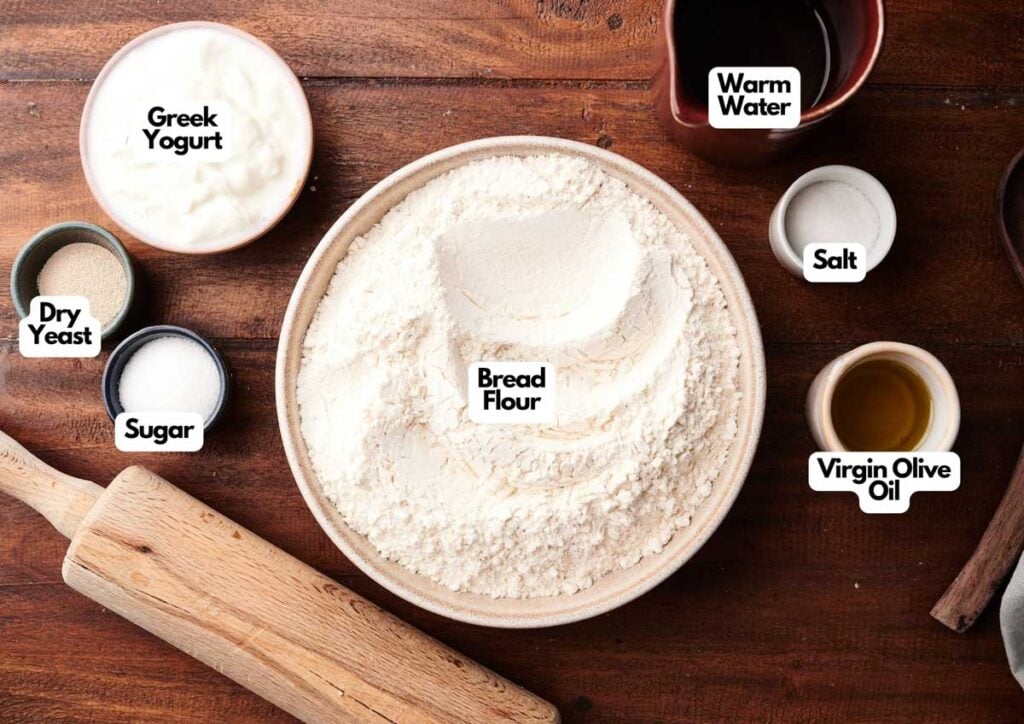
Ingredients You’ll Need
You’ll need all the ingredients shown in the photograph below.
How to Make Pita Bread with Step-By-Step Instructions
Scroll down for the full recipe card containing a full printable recipe and measurements in both US customary and metric units.
If you follow my simple instructions, you’ll find this homemade pita bread recipe a lot more approachable than you might expect.
Activate Yeast
In a large mixing bowl, combine warm water, active dry yeast, and a teaspoon of sugar. A bowl with a nonslip bottom is ideal for recipes with dough like this one, as it stays in place while you mix.
Stir gently, then let it sit for 5 minutes, or until the surface looks foamy. This step tells you the yeast is alive and will give your pita bread a good rise.
Mix the Dough
Add bread flour, salt, the remaining tablespoon of sugar, olive oil, and Greek yogurt to the yeast mixture, then mix until the dough comes together. I use a wooden spoon to gently mix everything together.
It will look shaggy at first, but don’t worry; kneading will smooth it out. Overmixing can cause the pita dough to become too tight and tough. Don’t forget to scrape down the sides cleanly with a silicone spatula so nothing goes to waste.
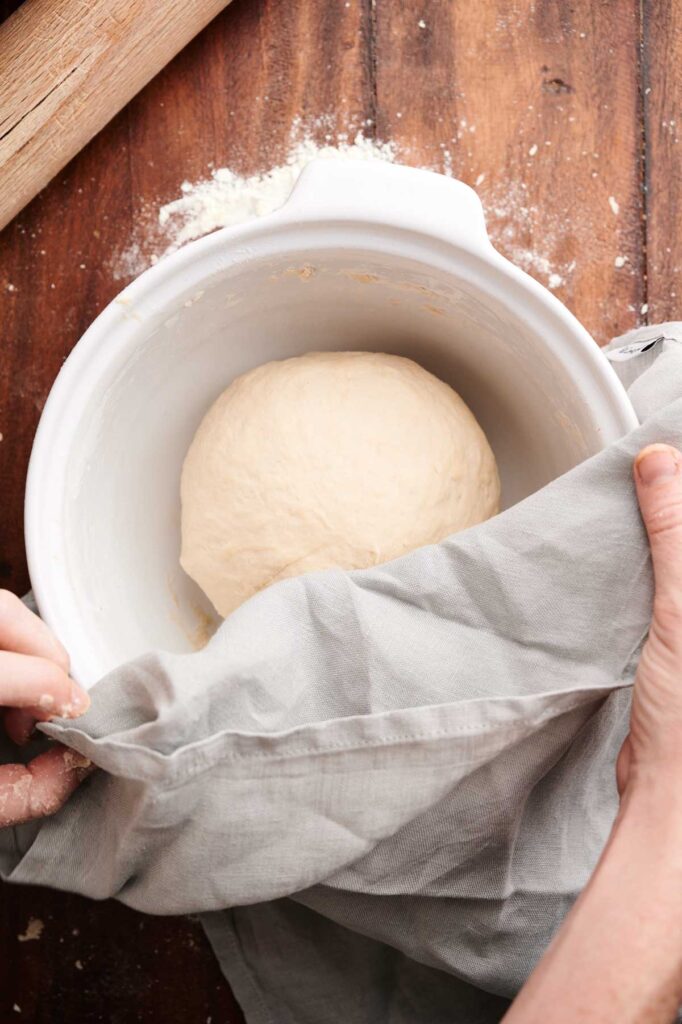
Knead and Rise
Move the dough onto a lightly floured work surface and knead it for 7–10 minutes, until it feels smooth, soft, and elastic. A large wood cutting board or a silicone baking mat works great as a kneading surface and keeps cleanup simple.
If it’s too wet, sprinkle a bit more flour; just don’t overwork it, or you may lose the stretchiness you need for the classic pita pockets. Place it into a lightly oiled bowl, turning it once so it’s well-coated. This will keep the dough from drying out or sticking to the sides of the bowl as it rises
Cover the bowl with a towel or plastic wrap to prevent a crust from forming, which would keep it from expanding properly. A microfiber kitchen towel works well at trapping warmth while letting the dough breathe. If you prefer to seal it completely, go for this BPA-free wrap.
Let it rise in a warm spot for about 2 hours, or until it doubles in size. Yeast is most active in a cozy, slightly warm environment, which speeds up fermentation. If the space is too cool, the yeast will work more slowly, and the dough may take much longer to rise.
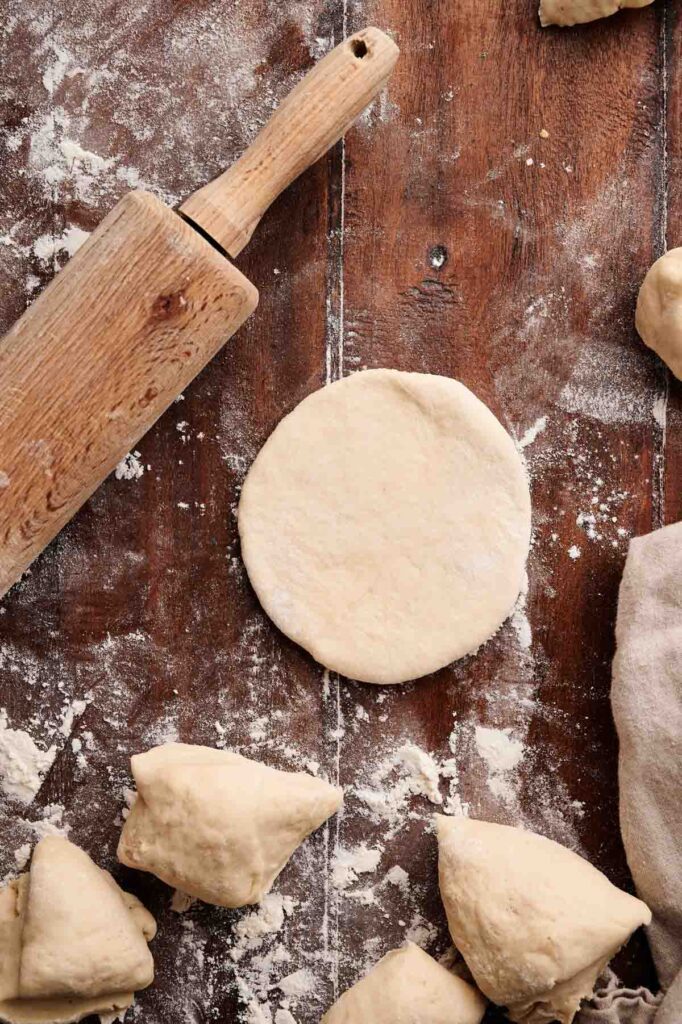
Shape the Pitas
Punch down the risen dough to release excess air. If you don’t, you’ll get uneven crumbs and large air pockets in random spots.
Turn it out onto a clean surface and use a bench scraper or knife to divide it into 12 equal pieces so they bake at the same rate. This dough cutter makes dividing and moving sticky dough much easier.
Roll each piece into a ball, then use a rolling pin to flatten into round disks about ¼–½ inch thick. I like using a nonstick rolling pin to get even thickness without the dough sticking.
Don’t roll the dough too thin, or it won’t puff up into pockets. Keep them uniform so they bake and puff evenly in the oven.
Bake and Cool
Preheat your oven to 500°F (260°C) and line two baking sheets with parchment paper. A heavy-duty baking sheet like this one can withstand extreme temperatures remarkably well without warping.
You could also try baking a few on a pizza stone for extra-crisp bottoms. These pre-cut parchment sheets help keep the dough from sticking and make cleanup a breeze.
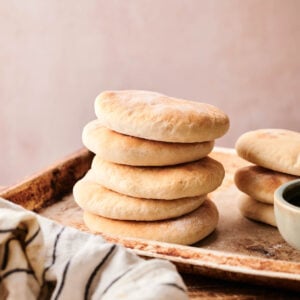
Place the shaped disks on the sheets, leaving space between each so they have room to expand and puff without sticking together. Bake one sheet at a time for 5–8 minutes, rotating the pan halfway through for even browning.
The pitas should puff up with a pocket inside and turn lightly golden on top. Once you see these signs, transfer them immediately to a wire rack so the bottoms don’t steam or become soggy. This nonstick cooling rack helps cool them evenly without trapping moisture underneath.
Serve Warm
Once cooled slightly, you can dust the pitas lightly with extra bread flour for a rustic bakery look. I use a fine mesh sifter to dust the top evenly without dumping too much in one spot.
Finally, serve warm and enjoy!
If you’re taking these to a picnic or a potluck, pack them in a hard-sided container to keep them from getting squished. To keep them warm, tuck the container inside an insulated casserole carrier so they stay soft and toasty until serving time.
Pita Bread
Equipment
- Pizza stone optional
- Stand mixer optional
Ingredients
- ¾ cup warm water
- 2 ¼ teaspoons active dry yeast
- 1 tablespoon sugar divided, plus 1 teaspoon
- 3 ¾ cups bread flour plus more for dusting
- 1 ½ teaspoons salt
- 3 tablespoons extra-virgin olive oil plus more for greasing
- ¾ cup Greek yogurt
Instructions
- In a large mixing bowl, combine the warm water, yeast, and 1 teaspoon of sugar. Stir gently, then let it sit for 5 minutes, or until the mixture becomes foamy.¾ cup warm water, 2 ¼ teaspoons active dry yeast, 1 tablespoon sugar
- Add the bread flour, salt, remaining 1 tablespoon sugar, olive oil, and Greek yogurt to the yeast mixture. Stir until the dough comes together.3 ¾ cups bread flour, 1 ½ teaspoons salt, 3 tablespoons extra-virgin olive oil, ¾ cup Greek yogurt
- Transfer the dough to a lightly floured surface and knead for 7–10 minutes, or until smooth and elastic. Lightly oil a clean bowl, place the dough inside, and cover with a towel or plastic wrap. Let rise in a warm spot until doubled in size, about 2 hours.
- Preheat oven to 500°F (260°C). Line two baking sheets with parchment paper.
- Punch down the risen dough and turn it onto a clean surface. Divide into 12 equal pieces and roll each into a ball. Using a rolling pin, flatten each ball into a circle about ¼–½ inch thick. Arrange them on the baking sheets, leaving space between each.
- Bake one sheet at a time until the pitas puff up and turn lightly golden on top. Begin checking at 5 minutes — they typically take about 8 minutes. Rotate the pan halfway through baking for even browning.
- Transfer baked pitas to a wire rack. Serve warm or store for later use.
Video
Notes
- Check the yeast first: Make sure you use lukewarm water, not cold or hot. If the yeast doesn’t foam after 5 minutes, start over with fresh yeast. You can also use instant yeast instead, which activates quickly and can shorten the rise time.
- Mix wet to dry: Always add the flour after the yeast mixture has activated, so the rise isn’t slowed down. If you add it too early, the dough won’t rise well, and you’ll end up with less lift in your bread.
- Season with the right salt: Using kosher salt instead of table salt gives a cleaner, less sharp flavor in the dough, and it dissolves more evenly during mixing. I like keeping this salt grinder on hand, so I can easily control the amount when seasoning.
- Experiment with flour swaps: Bread flour gives chew, all-purpose flour makes them softer, and adding some whole wheat flour brings extra flavor and nutrition. Think of it like pizza dough; the flour you choose changes the bite and texture.
- Knead until smooth: Keep working the dough until it’s elastic and springs back slightly when poked. This builds structure, which is key to a perfect pita puff.
- Try a stand mixer: Use a stand mixer fitted with a dough hook on medium speed to knead the dough faster. It saves effort and gives you a very consistent gluten structure, though hand-kneading lets you feel the dough better.
- Let the dough rise fully: Don’t rush this step; wait until its size is doubled for a softer, airier texture, which will be worth it.
- Preheat the oven completely: You need high heat for pita bread, so make sure the oven and baking sheets are fully hot before the dough goes in. That’s what makes the steam kick in and creates the pocket inside.
Nutrition
Recipe Notes and Expert Tips
I’ve learned some small details that make a big difference when baking pita bread, and I recommend keeping these in mind.
- Check the yeast first: Make sure you use lukewarm water, not cold or hot. If the yeast doesn’t foam after 5 minutes, start over with fresh yeast. You can also use instant yeast instead, which activates quickly and can shorten the rise time.
- Mix wet to dry: Always add the flour after the yeast mixture has activated, so the rise isn’t slowed down. If you add it too early, the dough won’t rise well, and you’ll end up with less lift in your bread.
- Season with the right salt: Using kosher salt instead of table salt gives a cleaner, less sharp flavor in the dough, and it dissolves more evenly during mixing. I like keeping this salt grinder on hand, so I can easily control the amount when seasoning.
- Experiment with flour swaps: Bread flour gives chew, all-purpose flour makes them softer, and adding some whole wheat flour brings extra flavor and nutrition. Think of it like pizza dough; the flour you choose changes the bite and texture.
- Knead until smooth: Keep working the dough until it’s elastic and springs back slightly when poked. This builds structure, which is key to a perfect pita puff.
- Try a stand mixer: Use a stand mixer fitted with a dough hook on medium speed to knead the dough faster. It saves effort and gives you a very consistent gluten structure, though hand-kneading lets you feel the dough better.
- Let the dough rise fully: Don’t rush this step; wait until its size is doubled for a softer, airier texture, which will be worth it.
- Preheat the oven completely: You need high heat for pita bread, so make sure the oven and baking sheets are fully hot before the dough goes in. That’s what makes the steam kick in and creates the pocket inside.
How to Store Leftovers
Keep fully cooled pita bread in an airtight container or a resealable bag at room temperature for up to 3 days. These glass airtight containers keep the pitas fresh, their texture soft, and prevent them from drying out.
You can also store them in the refrigerator for up to 1 week if you’re prepping ahead. For longer storage, slip a piece of wax paper between each before freezing so they don’t stick together, and freeze for up to 3 months.
A freezer-safe container like this one helps protect them against freezer burn, while a durable freezer bag lets you save more freezer space. Thaw overnight in the fridge or on the counter before reheating.
To reheat, wrap them in foil and warm in the oven, or heat briefly in a skillet. Using aluminum foil helps them retain moisture and prevents overbrowning while warming up. If you’re using the stovetop, a cast-iron skillet helps crisp the outside just enough.
What to Serve With Pita Bread
Pita bread is incredibly versatile, so you’ll never run out of ways to enjoy it. Pair warm pita with tzatziki sauce and fresh tomatoes for a classic Mediterranean combo, or fill it with grilled meats and vegetables.
You can wrap it for falafel, or tear pieces to scoop up dips like hummus or baba ghanoush. Toast them into crunchy pita chips, serve them with soups and salads, or layer toppings on them for quick personal pizzas when you don’t feel like making a full crust.
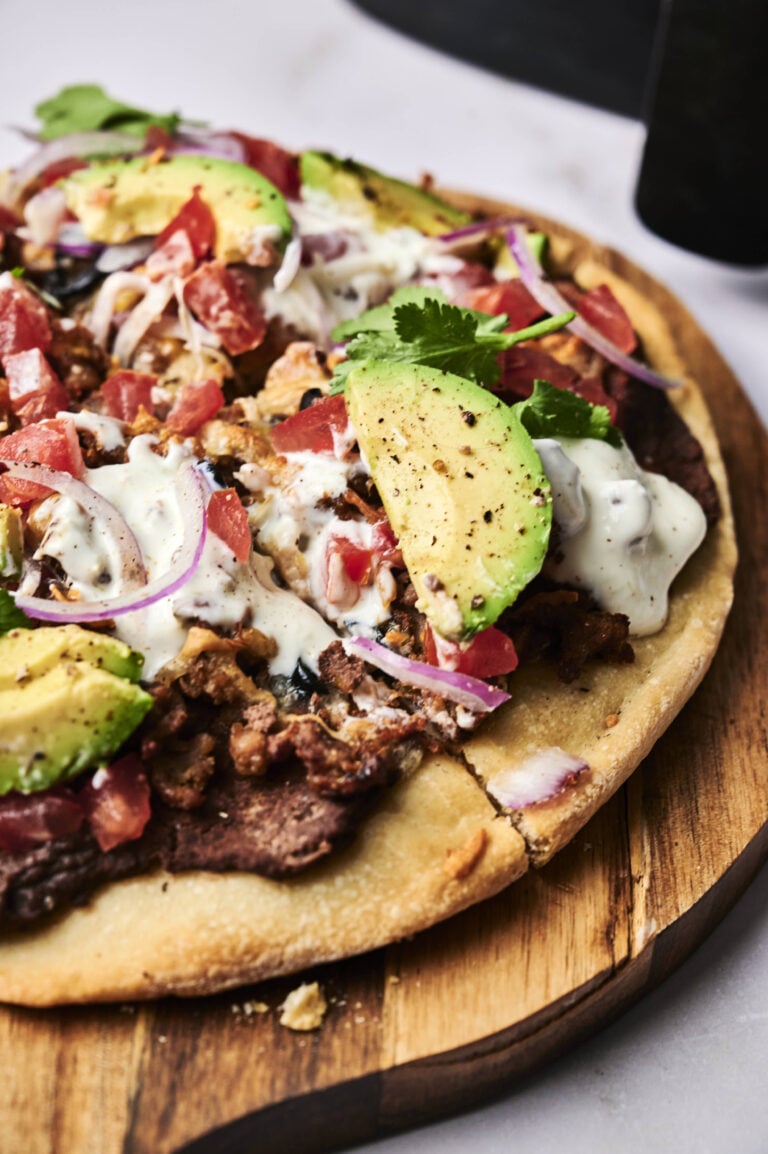
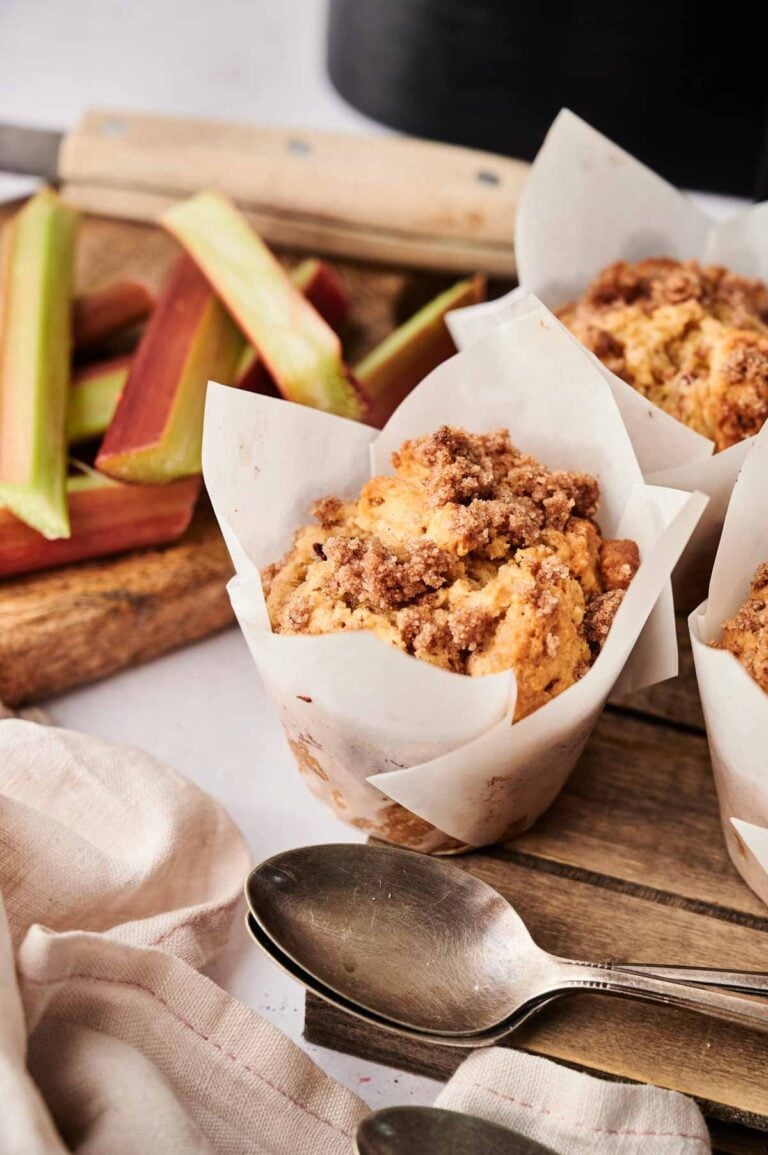
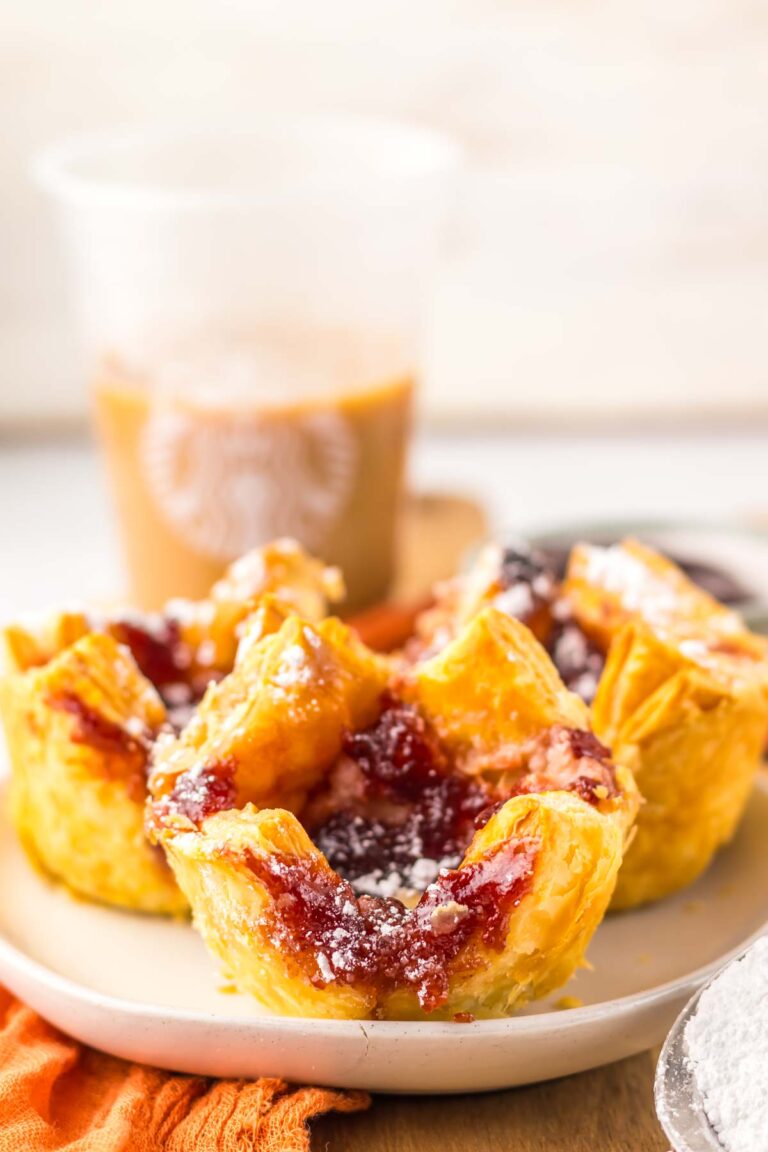
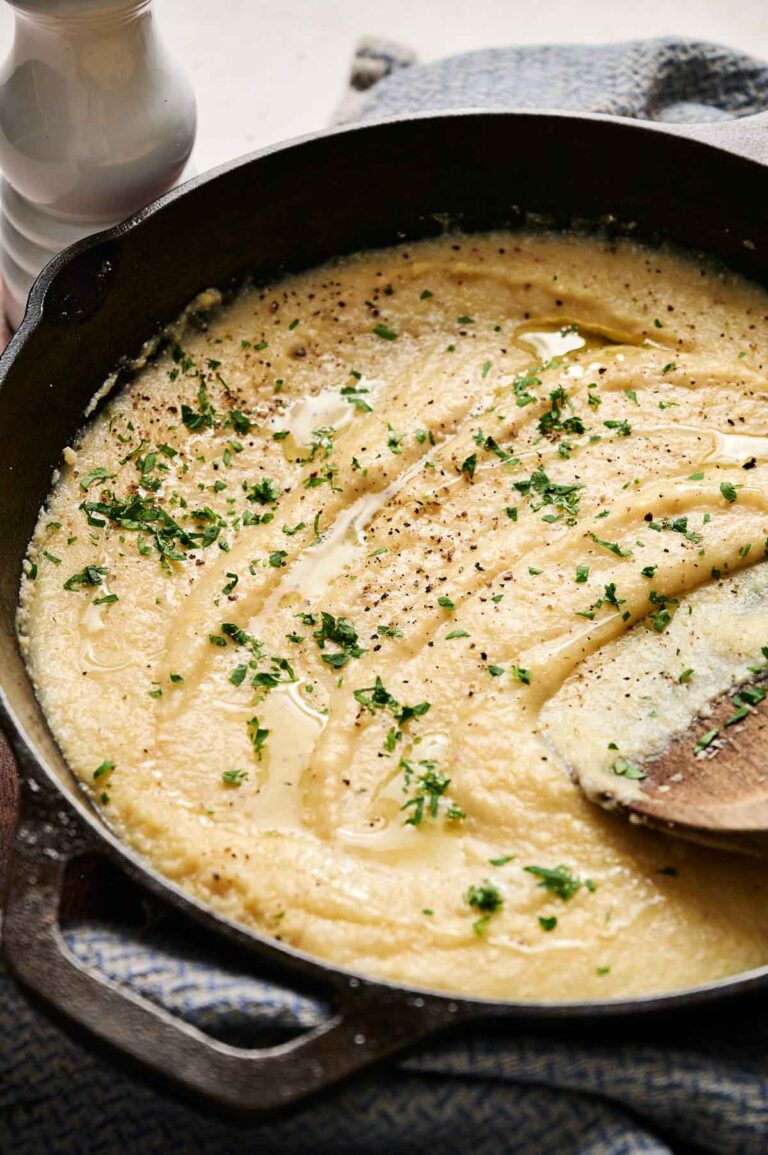
More Easy Recipes for You to Try at Home
If you’re looking for more homemade breads or crowd-pleasing dips to enjoy alongside pita, here are some of my favorites: