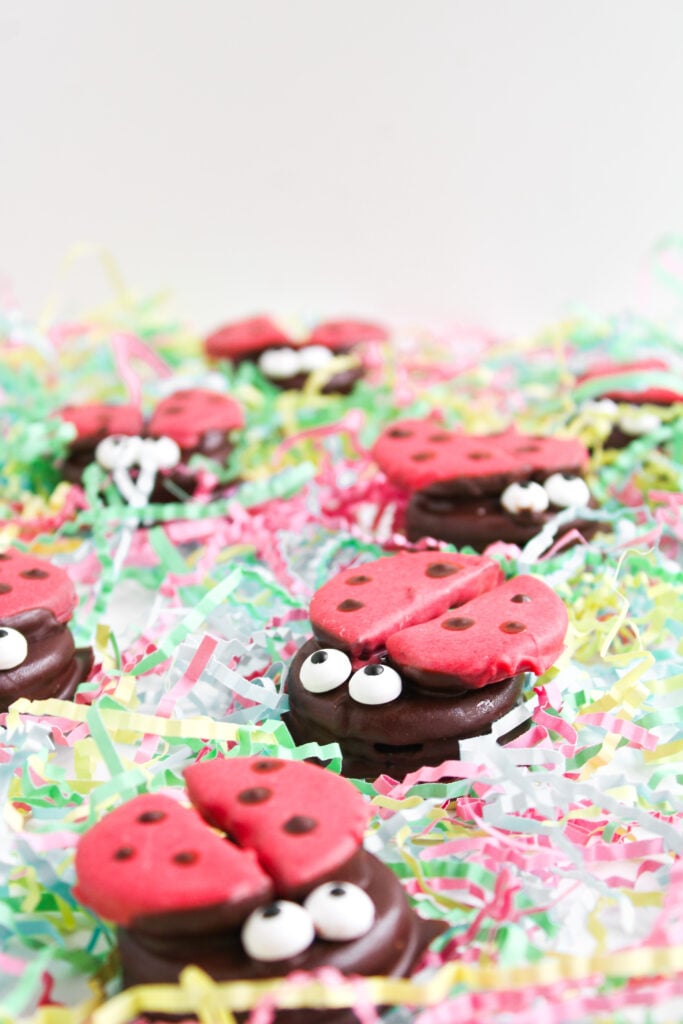
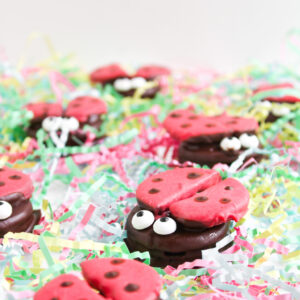
You don’t have to be crafty or skilled with chocolate to pull off these adorable Ladybug Chocolate Covered Oreos. All it takes is a few basic ingredients and some simple steps to turn these classic Oreos into something really eye-catching and fun. Whether you’re making them with kids, for a bake sale, or just want to bring something unexpected to the dessert table, it’s one of those recipes that’s easy to follow and enjoy.
This post contains affiliate links. As an Amazon Affiliate, if you purchase through those links, I earn a commission. Thank you!
I love making these ladybug Oreo cookies when I need something playful and easy to share, especially for birthdays, class parties, or just a fun weekend project with the kids. They’re the kind of treat that grabs attention without needing any fancy tools or baking, and they work for almost any crowd. You can prep them ahead, keep them chilled in the fridge, or even freeze them if you’re planning way in advance.
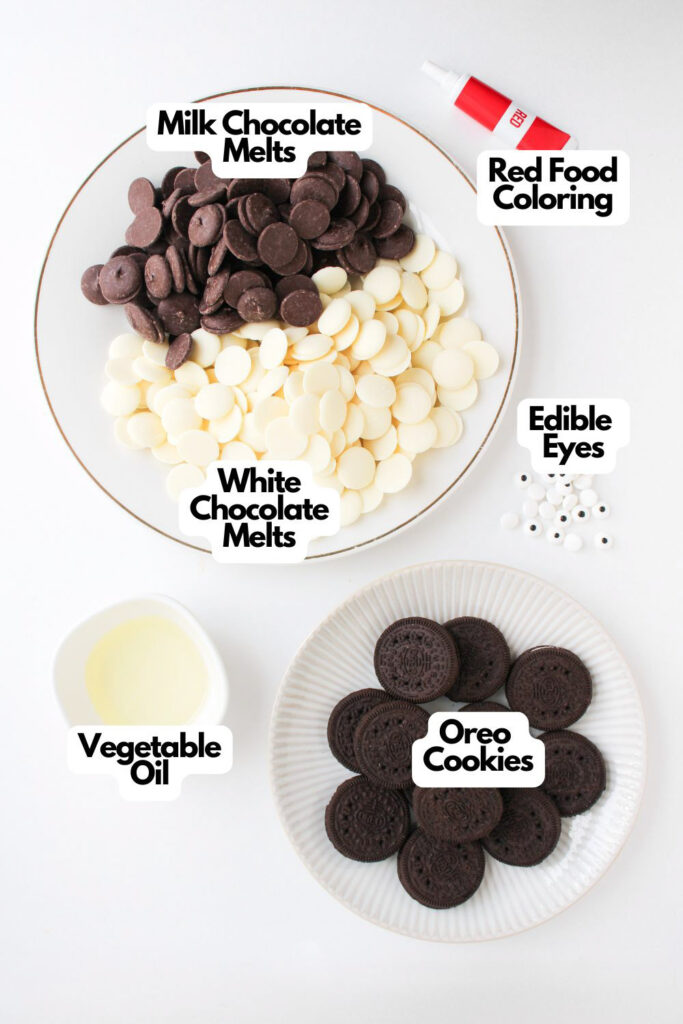
Ingredients You’ll Need
You’ll need all the ingredients shown in the photograph below.
How to Make Ladybug Chocolate Covered Oreos with Step-By-Step Instructions
Scroll down for the full recipe card containing a full printable recipe and measurements in both US customary and metric units.
If you follow my simple steps, you’ll see just how easy and fun it is to bring these chocolate-covered ladybugs to life.
Prep the Baking Sheets
Line two baking sheets with parchment paper—one will be for the full chocolate-coated Oreos and the other for the red-dipped wings.
Set them aside so they’re ready when it’s time to assemble.
Melt the Milk Chocolate
In a microwave-safe bowl, combine your milk chocolate melts and vegetable oil. Microwave in 30-second bursts, stirring well between each round, until the chocolate is completely melted and smooth.
Coat the Oreos in Chocolate
Dip about 12 Oreos into the melted chocolate, making sure they’re fully coated. Use a fork or a dipping tool so you don’t make a mess, and let any extra drip off.
Then use a toothpick or another fork to easily slide each coated cookie onto one of the baking sheets you lined earlier. Chill in the fridge for 10 minutes to let the chocolate set.
SERIOUSLY GOOD
DESSERTS!
Dessert First is a collection of 61 RECIPES to show you that you can make beautiful, impressive desserts right in your own kitchen, no matter your skill level.
Immediate eBook download. No physical book available.
Includes ad-free recipes like:
∙ Lemon Pound Cake
∙ Starbucks Cake Pops
∙ Boston Cream Pie
∙ Chocolate Mousse
∙ Matcha Tiramisu
...and much more!

Make the Wings
Take the remaining Oreos and gently twist them open to separate the cream filling from the cookie base. Use a butter knife to scrape it off. You can eat it on the spot (why not?), or save all the scrap filling in a small bowl to mix into buttercream for another dessert, swirl into a milkshake, sandwich between graham crackers, or simply, stack them!
Once separated, use a small, sharp knife to neatly cut each cookie half into two even pieces. These will become the wings, so try to keep the edges clean and intact for the best final look. Work slowly here—pressing too hard can cause the cookies to crack.
Prepare the Red Chocolate
Melt the white chocolate the same way you did with the milk chocolate. Once it’s melted, stir in red food coloring a bit at a time until you’ve got a nice bold red.
Mix it well so the color is smooth and even.
Dip the Wings
Dip each cookie wing piece into the red chocolate, coating both sides. Grab an unused fork or dipping tool to lift each piece out, and let any excess chocolate drip off.
Place them on the other parchment-lined tray and pop them in the freezer for about 10–15 minutes until they’re nice and firm.
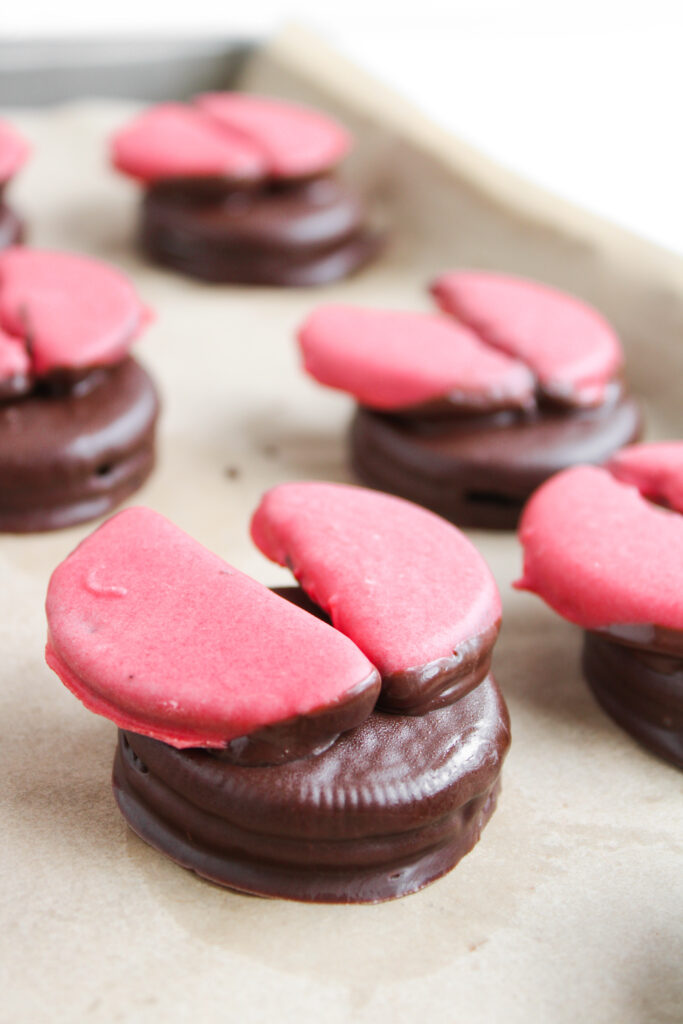
Assemble the Ladybugs
Take your chilled chocolate-covered Oreos and your red cookie wings. Dip just the bottom edge of each one into the remaining milk chocolate—this acts as a glue. You only need a small dab or thin layer to hold the wings—just enough to coat the edge. Too much will leave a mess, as it can ooze out when you press the wing onto the Oreo.
It helps to use baking tweezers or even just clean fingers if you’re careful when you dip the wings; they can be a little delicate, so light pressure is key here. Gently press two wings onto the sides of each whole Oreo. Hold them in place for a second so they stick or until they feel secure, then move on to the next.
If any start to slide, pop the tray back in the fridge for a few minutes to help the chocolate set faster.
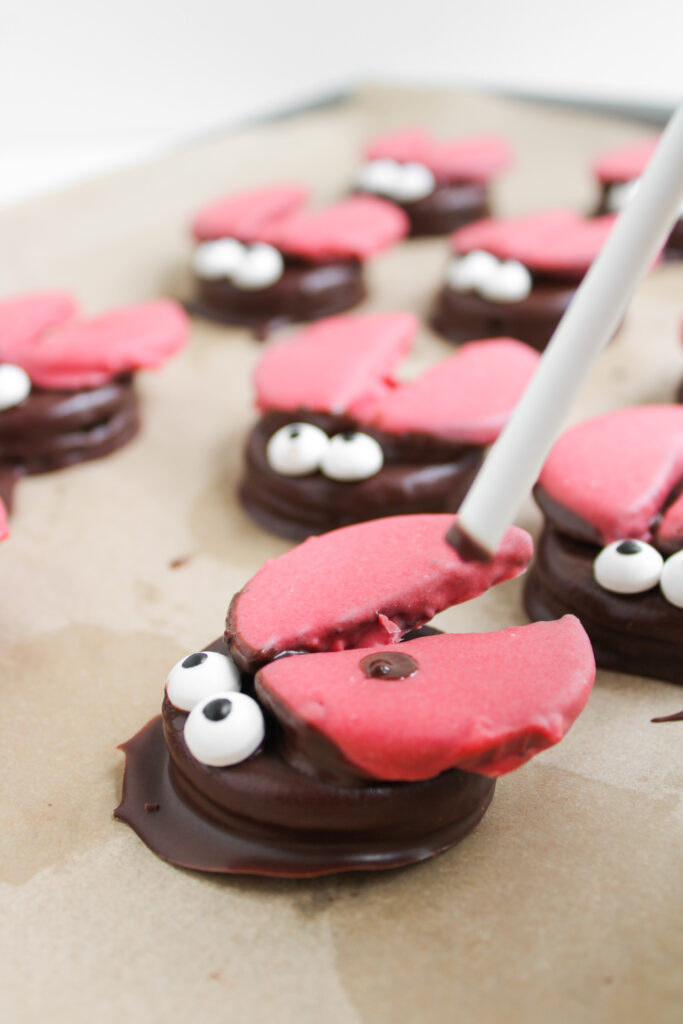
Add the Eyes and Spots
Dab a little melted chocolate on the back of each edible eye—again, this will act as a glue—and press two onto the top of each cookie. The eyes are tiny and can be tricky to handle, so using a pair of clean baking tweezers can make it much easier to position them neatly without any smudging.
After you’re done with the eyes, grab a cake pop stick or toothpick, dip it in the milk chocolate, and add little dots to the wings for that classic ladybug look.
Chill and Serve
Put the finished cookies back in the fridge for 10 minutes so everything sets nicely. Once they’re firm, they’re ready to serve—or store for later. Enjoy!
Ladybug Chocolate Covered Oreos
Ingredients
- 18 to 20 Oreo cookies
- 10 ounces milk chocolate melts
- 10 ounces white chocolate melts
- 1 tablespoon vegetable oil
- Edible eyes
- Red food coloring
Instructions
- Line two baking sheets with parchment paper. Set aside for assembly.
- In a microwave-safe bowl, combine the milk chocolate melts and vegetable oil. Microwave in 30-second bursts, stirring between each round, until smooth.10 ounces milk chocolate melts, 1 tablespoon vegetable oil
- Dip about 12 Oreos into the melted milk chocolate, fully coating each one. Let the excess drip off, then place on a lined baking sheet. Refrigerate for 10 minutes to set.18 to 20 Oreo cookies
- Take the remaining Oreos and gently twist them open. Cut each half into two equal pieces to make the wings—be careful to avoid breaking them. Use a small knife if needed.
- Melt the white chocolate in a microwave-safe bowl using the same 30-second method. Once smooth, stir in red food coloring a little at a time until it reaches a bright red shade.10 ounces white chocolate melts, Red food coloring
- Dip each Oreo wing half into the red chocolate, coating both sides. Place them on the second lined tray and freeze for 10–15 minutes until firm.
- Dip the bottom edge of each red wing into the leftover milk chocolate and press it onto the sides of a fully coated Oreo to form wings.
- Use a bit of melted milk chocolate to stick two edible eyes near the top of each cookie.Edible eyes
- Using a cake pop stick or toothpick, dip it into the milk chocolate and dot little spots on each wing for that ladybug look.
- Pop the completed ladybugs into the fridge for about 10 minutes, just until everything is set.
- Serve and enjoy!
Notes
- Smooth Melting: Stir in a bit of vegetable oil before microwaving your chocolate melts. It thins the chocolate just enough to make dipping easier and helps with an even coat.
- Clean Cookie Separation: Twist the Oreos slowly and use a butter knife or a paring knife to gently separate the sides. It’ll save you from cracking the cookies.
- Wing Cutting: Slice the cookie halves with a small, sharp knife using a light sawing motion. Don’t press too hard or they’ll break.
- Right Food Coloring: Only use gel or oil-based coloring in white chocolate. Water-based ones can cause it to clump or seize.
- Wing Assembly First: Stick on the wings before adding eyes so you don’t accidentally smudge or knock them off during handling.
- Clean Spots: Use the end of a toothpick for small, neat dots. You can practice on parchment paper first if you want.
- Chill in Batches: If your kitchen is warm, chill the decorated pieces between steps so nothing gets too soft or slides out of place.
Nutrition
SERIOUSLY GOOD
DESSERTS!
Dessert First is a collection of 61 RECIPES to show you that you can make beautiful, impressive desserts right in your own kitchen, no matter your skill level.
Immediate eBook download. No physical book available.
Includes ad-free recipes like:
∙ Lemon Pound Cake
∙ Starbucks Cake Pops
∙ Boston Cream Pie
∙ Chocolate Mousse
∙ Matcha Tiramisu
...and much more!
Recipe Notes and Expert Tips
I’ve made these enough times to know a few tricks that can make your cookie bugs turn out clean, cute, and mess-free.
- Smooth Melting: Stir in a bit of vegetable oil before microwaving your chocolate melts. It thins the chocolate just enough to make dipping easier and helps with an even coat.
- Clean Cookie Separation: Twist the Oreos slowly and use a butter knife or a paring knife to gently separate the sides. It’ll save you from cracking the cookies.
- Wing Cutting: Slice the cookie halves with a small, sharp knife using a light sawing motion. Don’t press too hard or they’ll break.
- Right Food Coloring: Only use gel or oil-based coloring in white chocolate. Water-based ones can cause it to clump or seize.
- Wing Assembly First: Stick on the wings before adding eyes so you don’t accidentally smudge or knock them off during handling.
- Clean Spots: Use the end of a toothpick for small, neat dots. You can practice on parchment paper first if you want.
- Chill in Batches: If your kitchen is warm, chill the decorated pieces between steps so nothing gets too soft or slides out of place.
How to Store Leftovers
Once decorated and chilled, these cookies can be stored in an airtight container in the fridge or at room temperature for up to 2-3 weeks. Just make sure the room is cool so the chocolate doesn’t get melty.
You can also place parchment paper between layers of cookies to prevent them from sticking together and ruining the design.
If you’re planning ahead or want to save some for longer, you can freeze them too. Lay them in a single layer on a tray to freeze first, then transfer to a container with parchment between layers.
They’ll freeze beautifully for up to 2-3 months. Thaw in the fridge when ready to serve so the decorations stay intact and the chocolate doesn’t sweat.
What to Serve With Ladybug Chocolate Covered Oreos
These fun cookies go well with other no-bake treats like dipped strawberries, marshmallow pops, or chocolate bark.
If you’re setting up a dessert spread, add them alongside cupcakes, mini fruit skewers, or chocolate-dipped pretzels to round it out. They also pair perfectly with a glass of cold milk or hot cocoa if you want something simple and classic.
More Easy Recipes for You to Try at Home
I’ve got even more fun dessert ideas that are easy to pull off and always a hit, like this one!