Grilled Hot Dogs are one of those meals you can throw together fast, but still deliver in every bite. Whether you’re grilling over charcoal or gas, you can get the perfect balance of snap and char in just minutes. You can make them exactly how you like—from fully loaded with toppings to plain and simple.

This post contains affiliate links. As an Amazon Affiliate, if you purchase through those links, I earn a commission. Thank you!
I’ve made these hot dogs for everything from gamedays, picnics, to backyard cookouts on Memorial Day or Labor Day. They’re quick to throw on the grill, easy to dress up with toppings, and you can make them ahead, stash extras in the fridge, or freeze a batch for later. It’s my go-to for laid-back summertime food that doesn’t need a lot of planning.
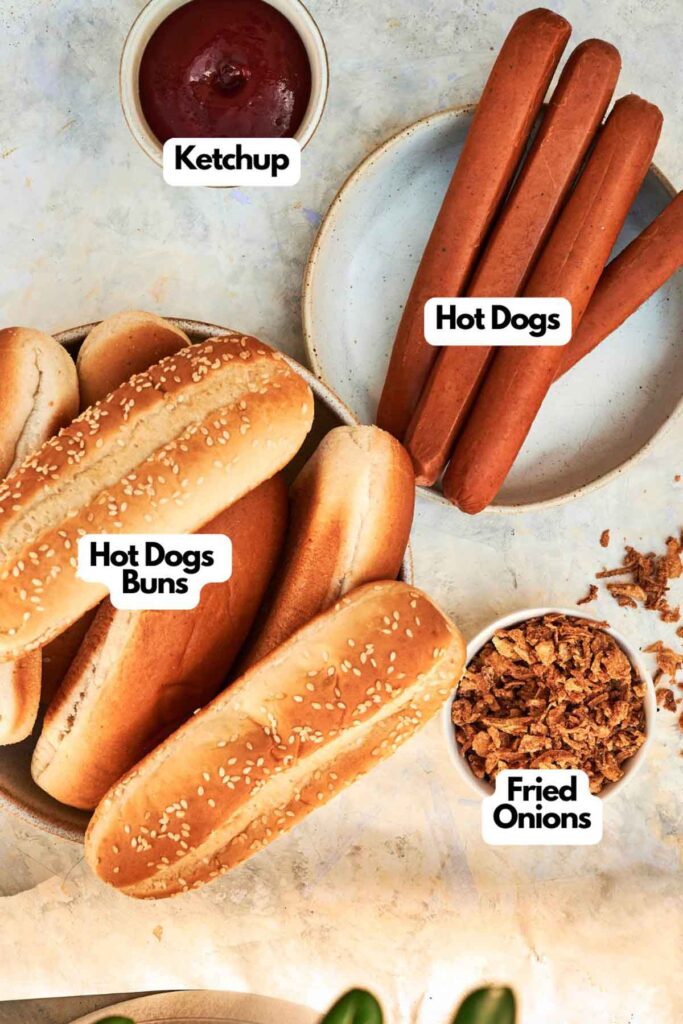
Ingredients You’ll Need
You’ll need all the ingredients shown in the photograph below.
How to Make Grilled Hot Dogs with Step-By-Step Instructions
Scroll down for the full recipe card containing a full printable recipe and measurements in both US customary and metric units.
You’ll find grilling hot dogs super quick and simple if you follow my simple steps—no special skills or equipment needed.
Preheat the Grill
Start by getting your grill nice and hot, about 20 minutes before you start cooking—this helps the hot dogs cook evenly and gives you that golden-brown exterior.
If you’re using a charcoal grill, push the hot coals to one side for indirect heat, and for a gas grill, turn all burners to high and aim for 400°F. This will give you better control and help make sure you get a nice sear.
For gas, I use the Weber Spirit II E-310—it preheats fast and gives me even searing without flare-ups. And when I want that classic smoky flavor, I go with the Weber Original Kettle Premium Charcoal Grill—the vent control and lid make it surprisingly easy to manage the heat, even for beginners.
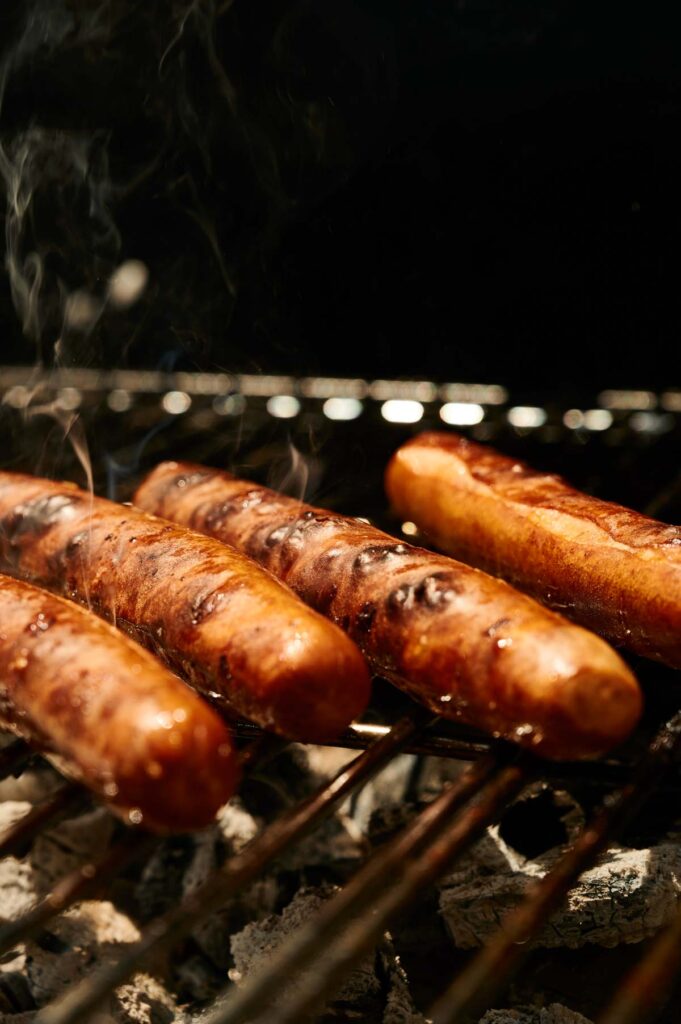
Grill the Hot Dogs
Place the hot dogs directly on the grates. Let them cook for 5 to 7 minutes, turning them every minute or two to give them great grill marks without burning or bursting the skins.
A pair of long-handled stainless steel tongs works way better than a fork—they don’t pierce the meat, and they keep your hands safe from the heat.
Warm the Buns
While the hot dogs are grilling, get the buns and if they’re not pre-sliced, gently cut them open with a serrated knife. A clean, shallow slice keeps the bun intact and ready to hold all your toppings without falling apart.
Just before the hot dogs finish on the grill, place the buns face-down on the upper grates above the hot dogs. The indirect heat will soften the buns and warm them through, giving them a light toast without drying them out.
Let Them Rest
Once the hot dogs are grilled just right with a nice char, take them off the heat and give them about 5 minutes to rest. That little pause makes a difference—it keeps the juices inside and the hot dogs from getting rubbery.
Don’t forget to grab your lightly toasted buns off the hot grill. If you’re anything like me and have fumbled one too many buns while rushing, a pair of heat-resistant grill gloves gives you the confidence to move things without getting scorched.
Load into Buns and Add Toppings
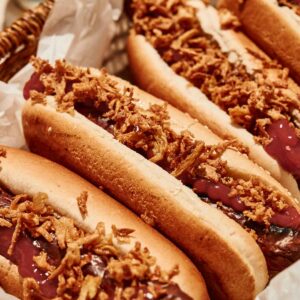
Tuck the grilled hot dogs into the warmed buns and pile on whatever toppings you like. Ketchup and yellow mustard? Go for it. Fried onions? Yes, please.
You can keep it classic or go totally over the top—it’s up to you. Last but not least, enjoy!
Grilled Hot Dogs
Ingredients
- 6 hot dogs
- 6 hot dog buns
Toppings of your Choice:
- Ketchup
- Mustard
- Fried onions
Instructions
- Start preheating about 20 minutes before cooking: For charcoal grills, arrange hot coals on one side only for indirect heat. For gas grills, turn all burners to high heat—aim for 400°F (200°C).
- Place the hot dogs directly on the grill grates. Grill for 5–7 minutes, turning every 1–2 minutes to ensure even browning and those perfect grill marks.6 hot dogs
- Remove the hot dogs from the grill and let them rest for 5 minutes.
- Place them in buns and load up with your favorite toppings.6 hot dog buns, Ketchup, Mustard, Fried onions
Video
Notes
- Choose the Best Hot Dogs: While turkey dogs, chicken dogs, jumbo dogs, and sausages are okay, beef franks or all-beef hot dogs usually have the best flavor and hold up well on the grill.
- Prep Toppings Ahead: Get everything ready before the hot dogs come off the grill. For fried onions, slice them thin and cook in a pan with a bit of oil until golden.
- Try a Spiral Cut: For more crispy edges and a fun twist, lightly spiral-slice the hot dogs before grilling.
- Don’t Overcrowd the Grill: Give each hot dog a little breathing room so they can brown instead of steam.
- Grill with the Lid Open: Keeping the lid open helps you keep an eye on your hot dogs and prevent flare-ups.
- Use Tongs, Not a Fork: Don’t poke holes—you’ll lose all the tasty juices as they’ll ooze out. Just grab a pair of tongs and rotate them gently.
- Move Them if They Split: If a hot dog starts to split, shift it to a cooler spot on the grill so it finishes gently.
- Toast the Buns at the End: Toss the buns face-down on the grill for about 30 seconds. It makes a big difference in texture.
Nutrition
Recipe Notes and Expert Tips
I’ve made this hot dog recipe tons of times, and these are the tips that always make a difference.
- Choose the Best Hot Dogs: While turkey dogs, chicken dogs, jumbo dogs, and sausages are okay, beef franks or all-beef hot dogs usually have the best flavor and hold up well on the grill.
- Prep Toppings Ahead: Get everything ready before the hot dogs come off the grill. For fried onions, slice them thin and cook in a pan with a bit of oil until golden.
- Try a Spiral Cut: For more crispy edges and a fun twist, lightly spiral-slice the hot dogs before grilling.
- Don’t Overcrowd the Grill: Give each hot dog a little breathing room so they can brown instead of steam.
- Grill with the Lid Open: Keeping the lid open helps you keep an eye on your hot dogs and prevent flare-ups.
- Use Tongs, Not a Fork: Don’t poke holes—you’ll lose all the tasty juices as they’ll ooze out. Just grab a pair of tongs and rotate them gently.
- Move Them if They Split: If a hot dog starts to split, shift it to a cooler spot on the grill so it finishes gently.
- Toast the Buns at the End: Toss the buns face-down on the grill for about 30 seconds. It makes a big difference in texture.
How to Store Leftovers
Leftover grilled hot dogs are pretty rare, but if you have some, store them in an airtight container in the fridge once cooled, and they’ll stay there for up to 3-4 days. You can reheat them in a skillet, toss them back on the grill, or even microwave them if you’re in a rush.
Grilled hot dogs also freeze well—just let them cool completely first, then wrap them in foil to prevent freezer burn or store them in freezer-safe bags. They’ll keep for up to 2 months and thaw easily overnight in the fridge.
What to Serve With Grilled Hot Dogs
When I’m grilling hot dogs, I like to keep things easy and fun to mix up. Classic sides like potato chips or a creamy potato salad always work. If you want to load them up, try melty cheddar cheese, crispy bacon, barbecue sauce, or a spoonful of pickle relish.
For bigger groups, pasta salad, fries, grilled corn, or even threading the hot dogs on a skewer with veggies makes the whole spread feel a little more special.
More Easy Recipes for You to Try at Home
I’ve got loads of other fast, low-fuss recipes that work just as well when you need something reliable and crowd-friendly, like these grilled hot dogs.