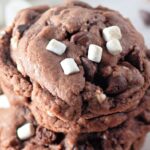
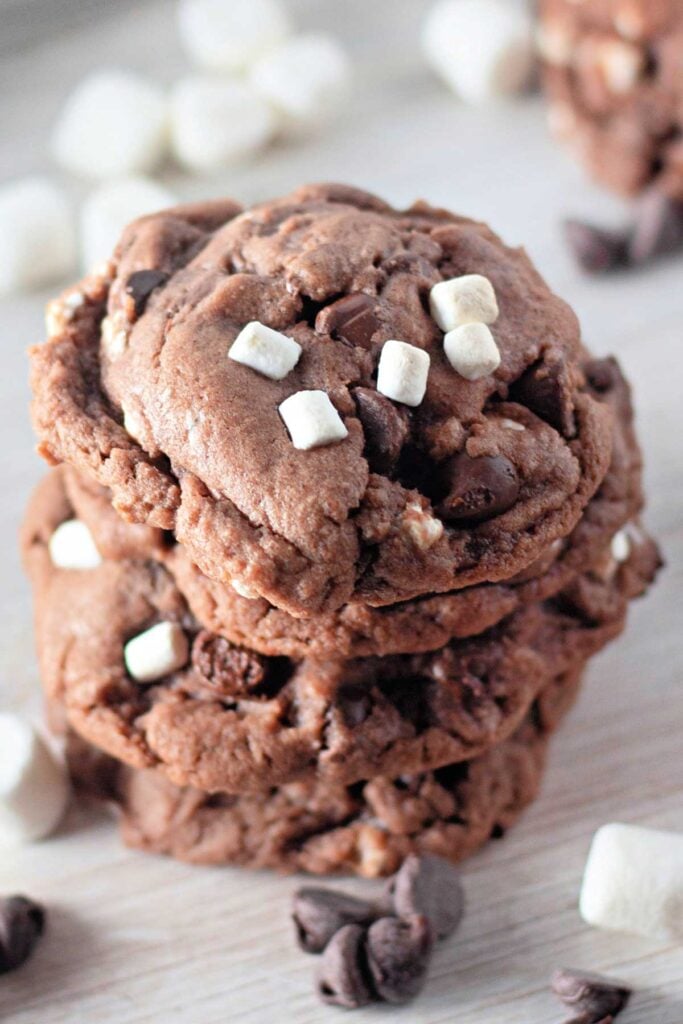
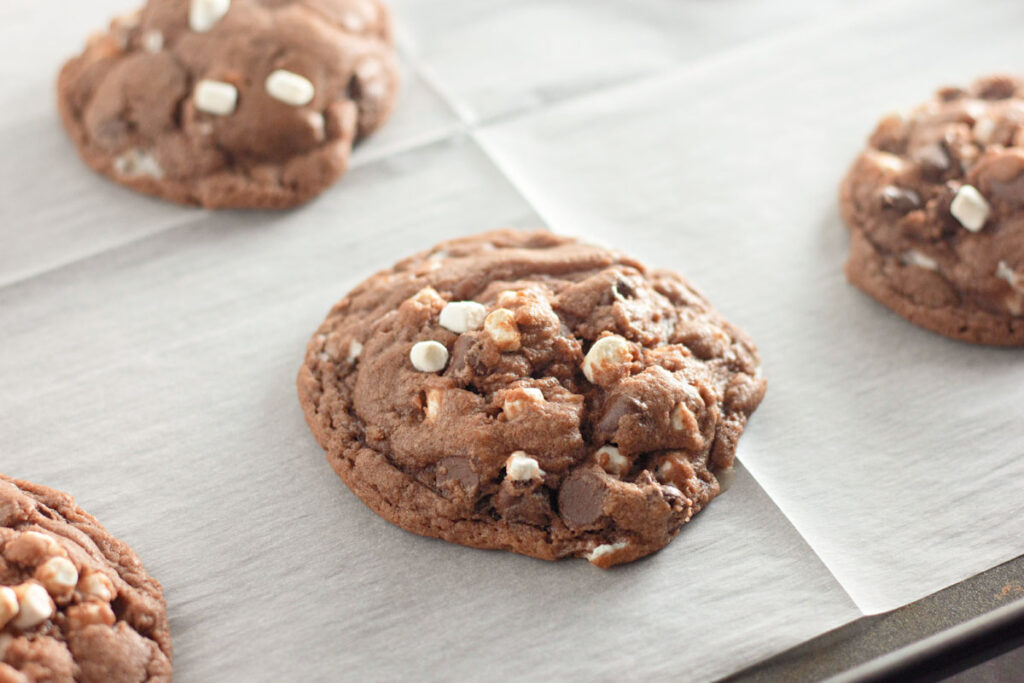
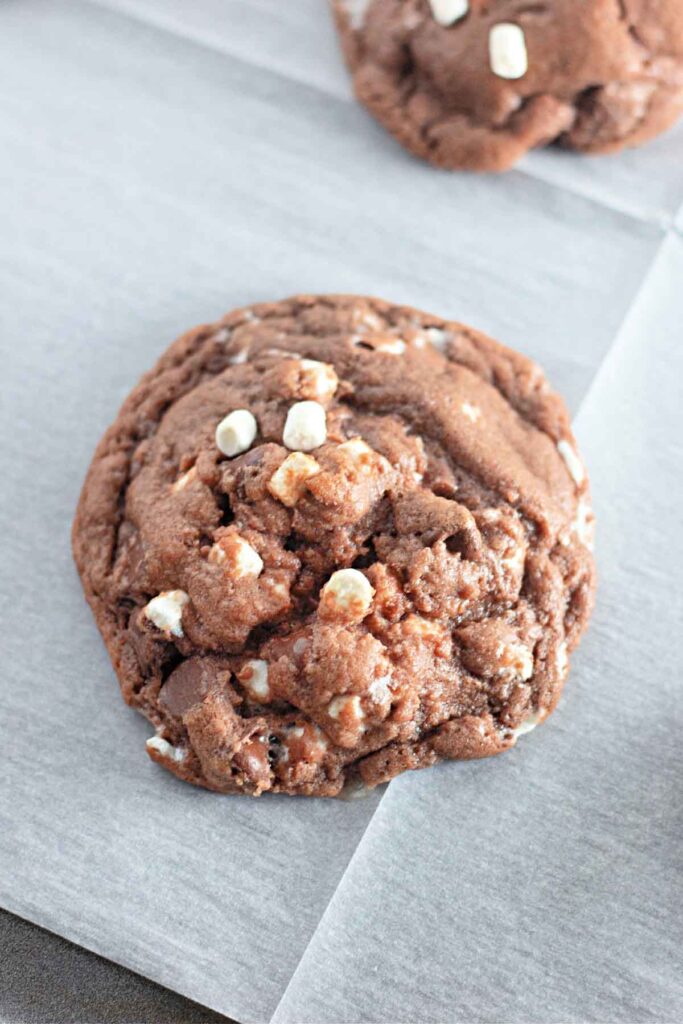
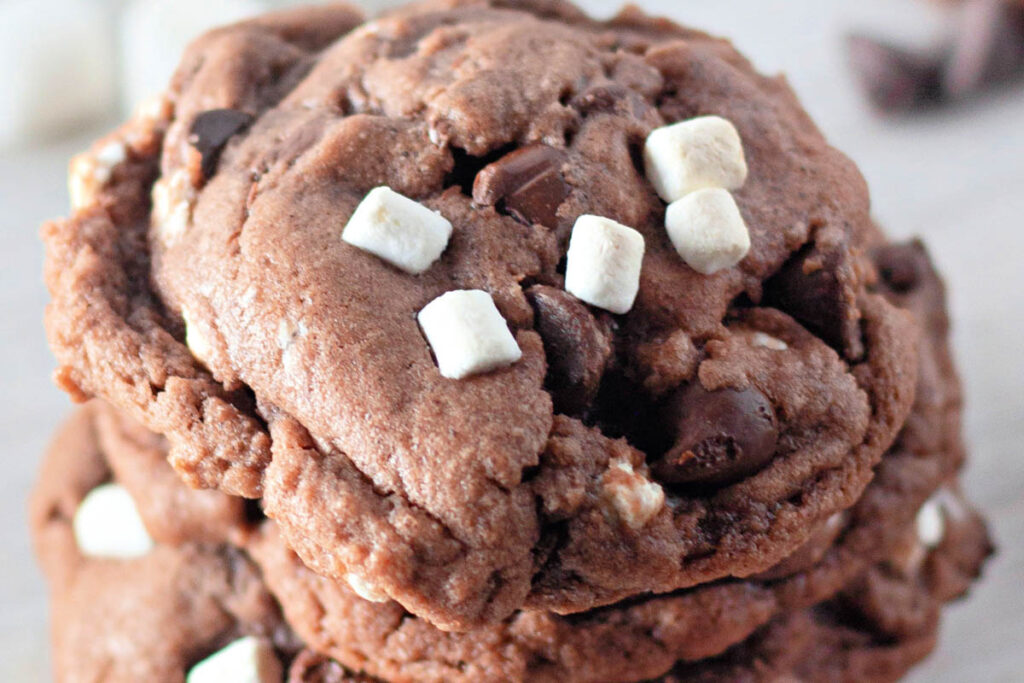
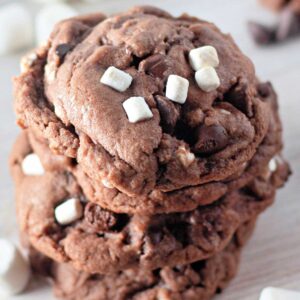
I can’t think of a better way to warm up a cold afternoon than baking a tray of Hot Cocoa Cookies. You get chewy centers, melted chocolate, and marshmallow sweetness, but there’s also a little surprise mixed into the dough that makes them taste like real hot cocoa in a mug. Once you try it, you’ll see what I mean, and you’ll likely find yourself making batches on repeat.
This post contains affiliate links. As an Amazon Affiliate, if you purchase through those links, I earn a commission. Thank you!
These cookies are my go-to cozy treat for Christmas, though I also love making them for casual get-togethers or hangouts with friends. You can also send them as a gift, bring them to a party, or enjoy them by yourself; they are just as versatile as they are incredibly satisfying. Since they can be made ahead, stored, or even frozen, they’re easy to keep on hand for any occasion.
Ingredients You’ll Need
You’ll need all the ingredients shown in the photograph below.
How to Make Hot Cocoa Cookies with Step-By-Step Instructions
Scroll down for the full recipe card containing a full printable recipe and measurements in both US customary and metric units.
If you follow my easy steps, you’ll see how simple it is to mix, bake, and enjoy a batch of these chocolatey cookies.
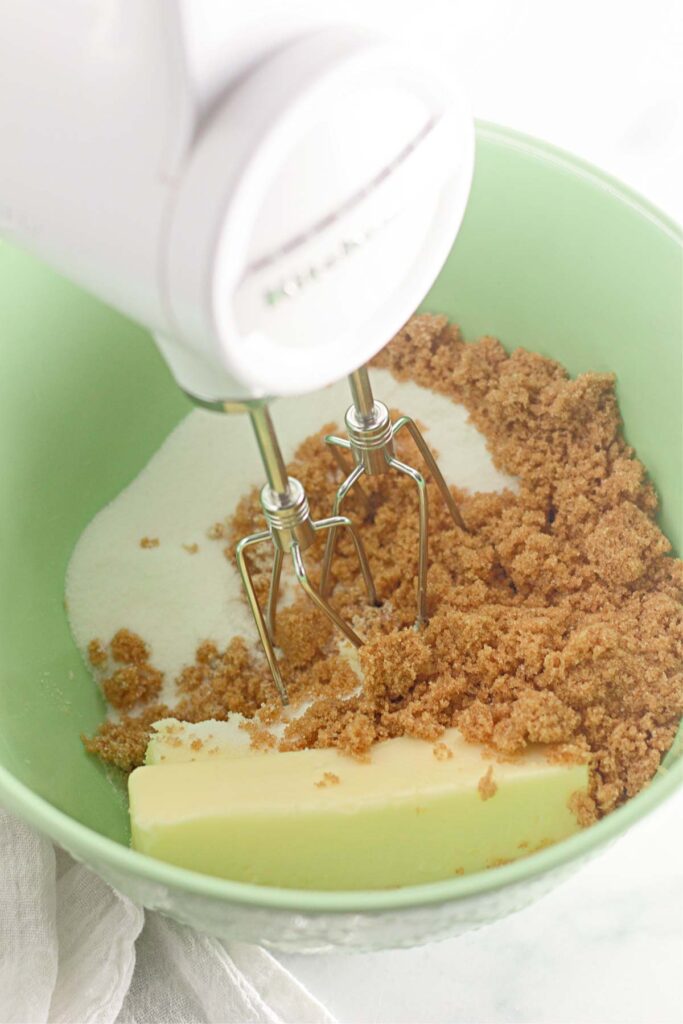
Cream butter with sugars
In a large bowl of a stand mixer with a paddle attachment, beat the softened butter with both granulated and brown sugar on medium speed until the mixture looks light and fluffy. A powerful stand mixer does the job beautifully, but a hand mixer works great as well.
Add the eggs and vanilla extract, dropping down to low speed and mixing until everything blends together smoothly. If you beat too fast, the mixture can become foamy and incorporate too much air, which can throw off the texture of the cookies once baked.
SERIOUSLY GOOD
DESSERTS!
Dessert First is a collection of 61 RECIPES to show you that you can make beautiful, impressive desserts right in your own kitchen, no matter your skill level.
Immediate eBook download. No physical book available.
Includes ad-free recipes like:
∙ Lemon Pound Cake
∙ Starbucks Cake Pops
∙ Boston Cream Pie
∙ Chocolate Mousse
∙ Matcha Tiramisu
...and much more!

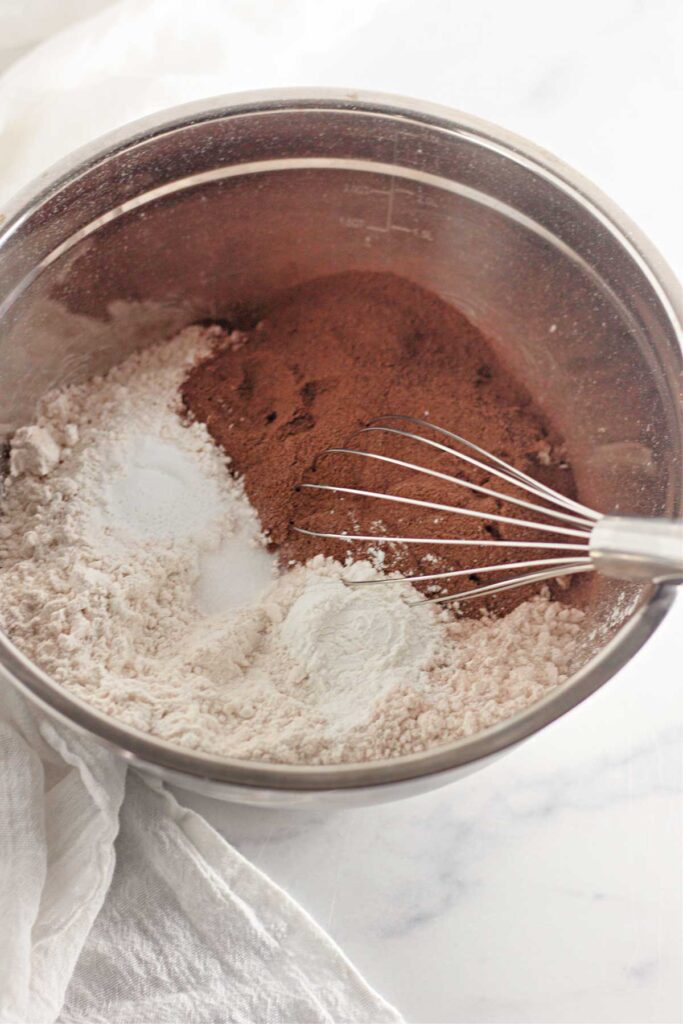
Combine the dry ingredients
In another large or medium bowl, whisk together the flour, hot cocoa mix, baking powder, and salt. Mixing them first keeps everything even and prevents clumps later.
I use a stainless steel mixing bowl with a grippy bottom, so it stays in one place as I whisk, and a sturdy balloon whisk to combine everything quickly and evenly.
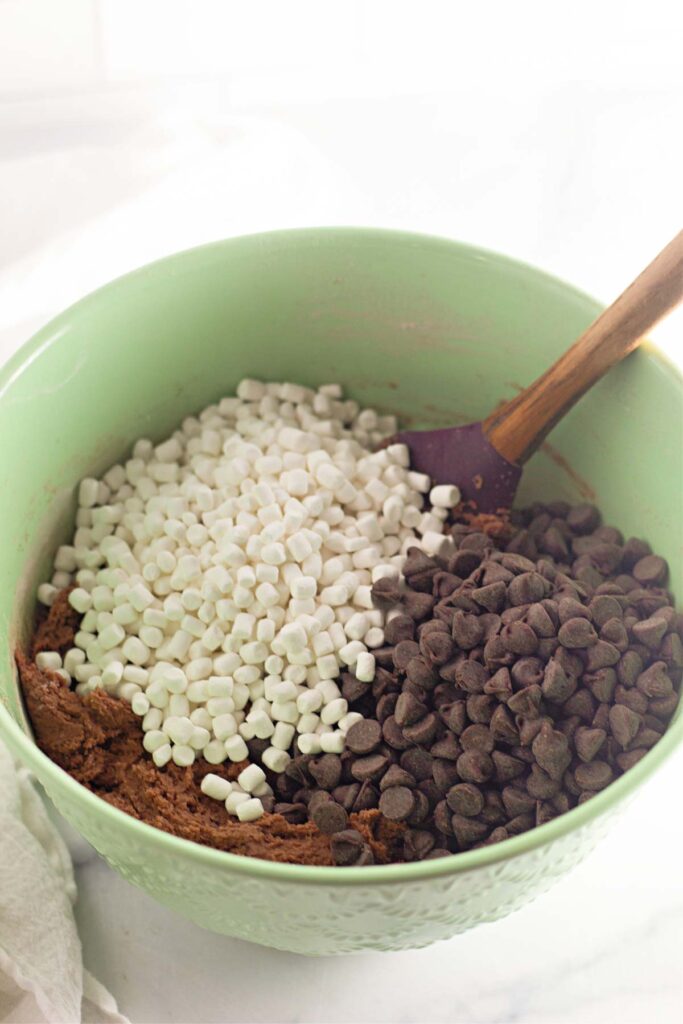
Form the dough
Slowly add the flour mixture to the wet ingredients, stirring until a thick cookie dough forms. Be sure to scrape down the sides of the bowl once or twice so everything mixes evenly without dry spots. A silicone spatula makes it much easier to scrape down the bowl without scratching it.
Fold in the chocolate chips and the dried mini marshmallows, making sure they’re spread throughout the dough so you get something sweet with every bite.
Chill the dough
Cover the bowl with plastic wrap to keep the dough from drying out or absorbing odors. Place it in the fridge for at least 30 minutes. Chilling helps the cookies keep their shape and bake more evenly, and keeps the marshmallows from spreading too much.
I use this BPA-free plastic wrap that seals tightly and doesn’t tear easily. If you want a reusable option, these stretchable food lids are great for covering bowls without waste.
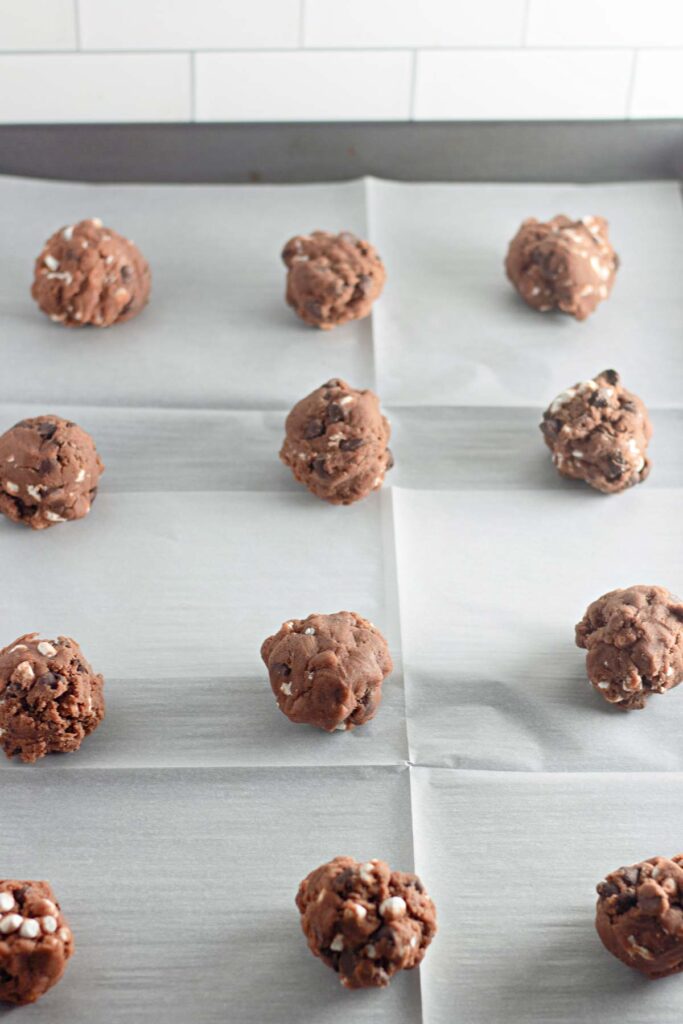
Scoop and bake
Preheat your oven to 350°F (180°C) and line baking sheets with parchment paper for easy cleanup. A rimmed baking sheet like this one heats evenly without hot spots, while precut parchment sheets like this prevent sticking and lay flat without curling.
Scoop the dough into 1 ½-inch cookie dough balls and place them on the prepared sheets. Leave at least 1 inch of space between each cookie so they have room to spread. Having a cookie scoop on hand makes portioning the dough super quick and consistent.
You can sprinkle extra marshmallows or chocolate chips on the center of each cookie if you like it extra sweet. Bake for 9 to 11 minutes, or until the edges are just set while the centers still look slightly soft, so they stay chewy once they continue to firm up later as they cool.
Cool the cookies
Let the cookies sit on the baking sheet for 3 to 5 minutes before moving them to a wire rack. This gives them time to firm up without falling apart. I use this nonstick cooling rack so the cookies don’t stick while they cool.
Once cooled, serve them on their own or with your favorite drink, and enjoy!
If you’re bringing these cookies to a party or potluck, pack them in a hard-sided container to keep them protected or from getting crushed. Slide the container into an insulated casserole tote to keep the cookies warm, fresh, and cozy until serving time.
These delicious cookies also make a great gift for birthdays or holidays. You can use a gift box with a window and a jute string like this, which makes them look presentable and even more inviting, and feel a little special.
Recipe Notes and Expert Tips
I like to keep a few simple tricks in mind that make these cookies turn out their best every time.
- Soften the butter properly: Let the butter sit at room temperature for about half an hour so it creams easily with the sugars.
- Use electric mixer wisely: Be careful with the mixture if you’re using an electric mixer, since it can go from smooth and fluffy to overmixed real quick. Keep an eye on the speed since overmixing can make the cookies dense instead of chewy.
- Measure the cocoa mix carefully: Four packets or ¾ cup of hot cocoa mix is enough to get that chocolate flavor without overpowering the dough. This set of measuring cups is a must-have for accurate measurements of dry ingredients without guessing.
- Mix the dry ingredients first: Whisking them together before adding keeps the dough smooth and well combined.
- Add baking soda as a booster: Baking soda along with the baking powder helps the cookies spread a bit more and brown better, giving you chewy edges with soft centers. It keeps the recipe true to its style without turning the cookies thin and crisp.
- Swap in cocoa powder if needed: You can replace the hot cocoa mix with unsweetened cocoa powder if needed. Just note that the flavor will be more intense and less sweet, so you may want to add an extra few tablespoons of sugar to balance it.
- Try large marshmallows: You can halve a large marshmallow if you want a different look. Place a marshmallow half on top of the dough ball before baking for a gooey, toasty finish. I use sharp kitchen shears to cut each piece without squishing it.
- Check cookies early: Pull them from the oven when the edges are set but the centers look slightly soft so they stay chewy. If you’re unsure whether they’re done, a wooden toothpick can help check the centers for doneness easily.
How to Store Leftovers
Keep your cookies in an airtight container at room temperature for up to 2 to 3 days, or in the refrigerator for up to a week, and they’ll stay soft and chewy.
For countertop storage, I like using this glass cookie jar, as it looks nice on the counter, and keeps them visible and sealed tight. If I’m keeping them chilled, I use a stackable glass food container to keep them fresh without letting moisture in.
You can also freeze them in a freezer-safe container for up to 2 to 3 months. These durable freezer containers help protect the cookies against freezer burn. When you’re ready to enjoy them, let them thaw at room temperature.
More Easy Recipes for You to Try at Home
If you’re in the mood for more cookie recipes, I’ve got a few more cozy favorites you might want to try next:
- Chocolate Chip Cookies
- Chocolate Cherry Cookies
- Ladybug Chocolate Covered Oreos
- Pumpkin Oatmeal Cookies
- Earl Grey Lemon Cookies
Hot Cocoa Cookies
Equipment
Ingredients
- 1 cup 2 sticks butter softened
- 1 cup granulated sugar
- ⅔ cup brown sugar packed
- 2 large eggs
- 1 teaspoon vanilla extract
- 3 ¼ cup all-purpose flour
- 4 packages hot cocoa mix or ¾ cup hot cocoa mix
- 2 teaspoons baking powder
- ½ teaspoon salt
- 1 cup semi-sweet chocolate chips regular or mini
- 1 cup dried mini marshmallows the type made for hot cocoa, not regular mini marshmallows
Instructions
- In a large bowl, beat together the softened butter, granulated sugar, and brown sugar until light and fluffy. Mix in the eggs and vanilla extract until fully incorporated.1 cup 2 sticks butter, 1 cup granulated sugar, ⅔ cup brown sugar, 2 large eggs, 1 teaspoon vanilla extract
- In a separate bowl, whisk together the flour, hot cocoa mix, baking powder, and salt. Gradually add this dry mixture to the wet ingredients, mixing until a thick dough forms. Stir in the chocolate chips and dried mini marshmallows.3 ¼ cup all-purpose flour, 4 packages hot cocoa mix, 2 teaspoons baking powder, ½ teaspoon salt, 1 cup semi-sweet chocolate chips, 1 cup dried mini marshmallows
- Cover the bowl with plastic wrap and refrigerate the dough for at least 30 minutes. This helps the cookies hold their shape while baking.
- Preheat your oven to 350°F (180°C). Line baking sheets with parchment paper.
- Scoop 1 ½-inch dough balls onto the prepared sheets, leaving at least 1 inch between each cookie. Bake for 9 to 11 minutes, or until the edges are just set but the centers still look slightly soft.
- Let cookies cool on the baking sheet for 3–5 minutes before transferring to a wire rack to cool completely.
Notes
- Soften the butter properly: Let the butter sit at room temperature for about half an hour so it creams easily with the sugars.
- Use electric mixer wisely: Be careful with the mixture if you’re using an electric mixer, since it can go from smooth and fluffy to overmixed real quick. Keep an eye on the speed since overmixing can make the cookies dense instead of chewy.
- Measure the cocoa mix carefully: Four packets or ¾ cup of hot cocoa mix is enough to get that chocolate flavor without overpowering the dough. This set of measuring cups is a must-have for accurate measurements of dry ingredients without guessing.
- Mix the dry ingredients first: Whisking them together before adding keeps the dough smooth and well combined.
- Add baking soda as a booster: Baking soda along with the baking powder helps the cookies spread a bit more and brown better, giving you chewy edges with soft centers. It keeps the recipe true to its style without turning the cookies thin and crisp.
- Swap in cocoa powder if needed: You can replace the hot cocoa mix with unsweetened cocoa powder if needed. Just note that the flavor will be more intense and less sweet, so you may want to add an extra few tablespoons of sugar to balance it.
- Try large marshmallows: You can halve a large marshmallow if you want a different look. Place a marshmallow half on top of the dough ball before baking for a gooey, toasty finish. I use sharp kitchen shears to cut each piece without squishing it.
- Check cookies early: Pull them from the oven when the edges are set but the centers look slightly soft so they stay chewy. If you’re unsure whether they’re done, a wooden toothpick can help check the centers for doneness easily.
Nutrition
SERIOUSLY GOOD
DESSERTS!
Dessert First is a collection of 61 RECIPES to show you that you can make beautiful, impressive desserts right in your own kitchen, no matter your skill level.
Immediate eBook download. No physical book available.
Includes ad-free recipes like:
∙ Lemon Pound Cake
∙ Starbucks Cake Pops
∙ Boston Cream Pie
∙ Chocolate Mousse
∙ Matcha Tiramisu
...and much more!