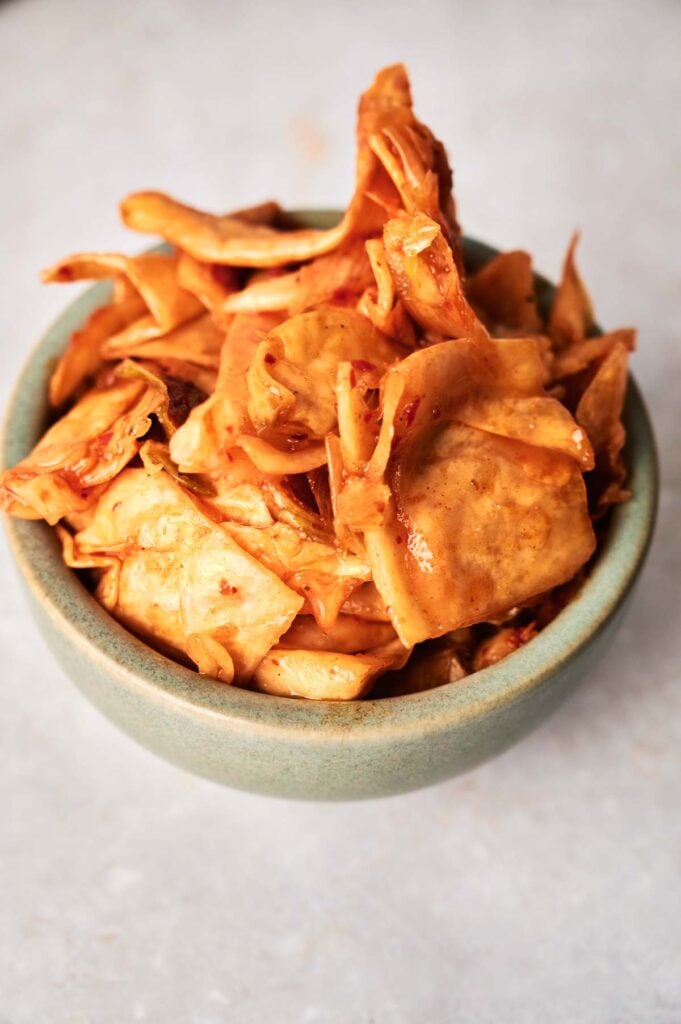
This Kimchi will save you trips to the store—you might even be surprised at how simple and satisfying it is to do it yourself. With napa cabbage, a bold mix of seasonings, and a few pantry staples you most likely already have in your kitchen, you’ll get all the bold, spicy Korean flavors right at your home. It’s beginner-friendly and even keeps getting better the longer it sits, which makes this fermentation recipe an easy win.
This post contains affiliate links. As an Amazon Affiliate, if you purchase through those links, I earn a commission. Thank you!
When I’ve got a busy week ahead or a casual dinner planned, having homemade kimchi in the fridge makes everything easier. I can make it well in advance, focus on other things while it ferments, and keep it in the fridge where the flavors get even better! And once you serve this on the table, you’ll find it on almost everyone’s plate, no matter who’s eating. It’s basically one of those versatile dishes that no one skips.
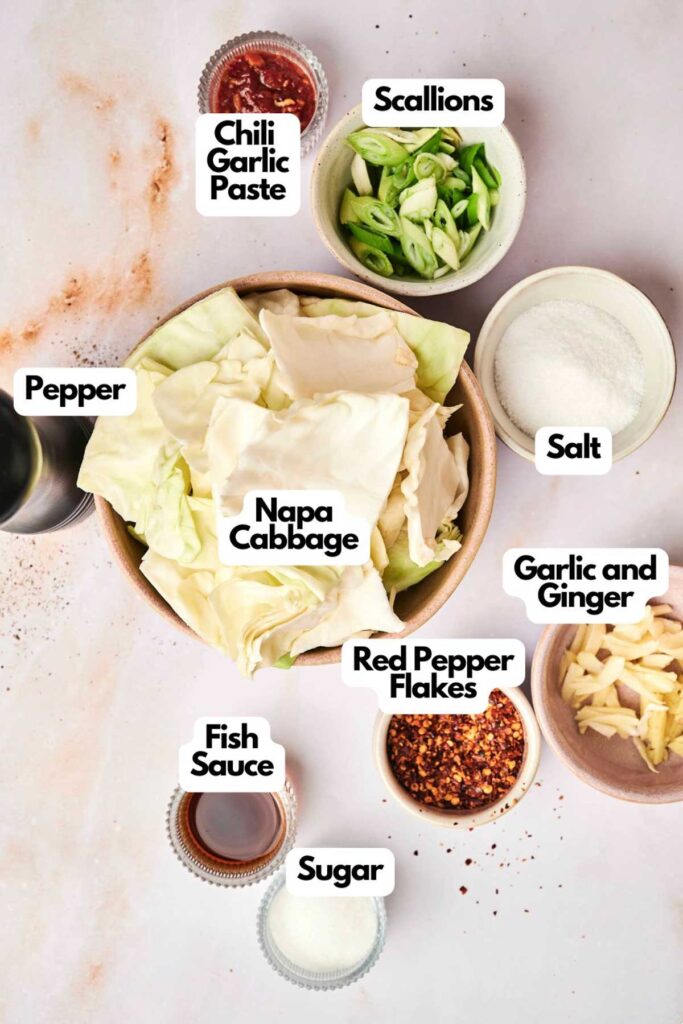
Ingredients You’ll Need
You’ll need all the ingredients shown in the photograph below.
Baechu kimchi, made with napa cabbage, uses the same lacto-fermentation process as sauerkraut and classic dill pickles. It starts by soaking the vegetables in a salty brine to get rid of any harmful bacteria.
Then, the good bacteria that are left—called Lactobacillus—get to work, turning the cabbage’s natural sugars into lactic acid. That’s what helps preserve the kimchi and gives it its signature tangy kick.
How to Make Kimchi with Step-By-Step Instructions
Scroll down for the full recipe card containing a full printable recipe and measurements in both US customary and metric units.
Making your own kimchi at home is easier than you think—just follow my simple steps.
Salt and Soften the Cabbage
Place your cabbage into a large colander or bowl and sprinkle it evenly with salt. Use your hands to massage the salt into the cabbage—this draws out water and helps soften the leaves.
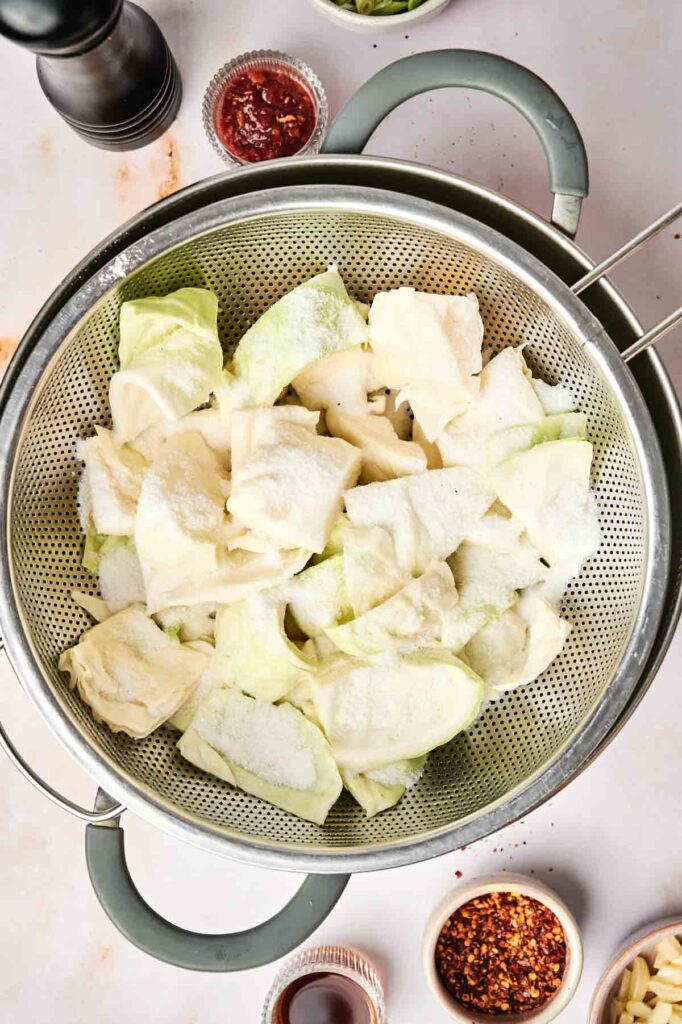
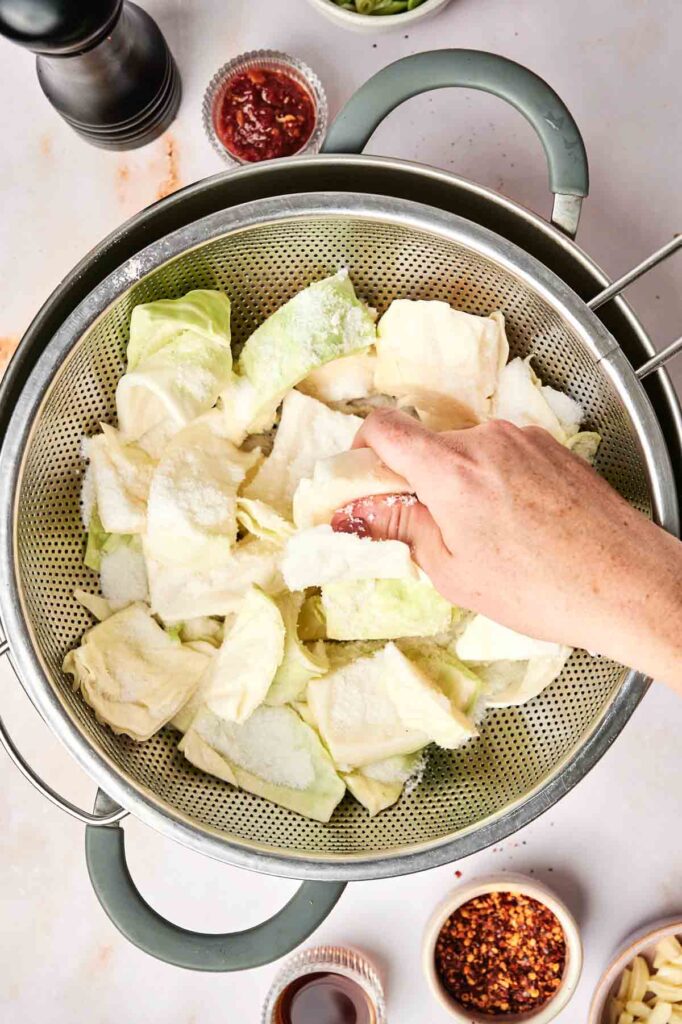
Once it starts to wilt, place a plate on top and weigh it down with something heavy, like a jar or can of beans. This helps squeeze out more moisture so the cabbage softens up evenly. Let it sit like this for 1 to 2 hours.
Make the Flavor Base
While the cabbage rests, mix up the garlic, ginger, sugar, fish sauce (you could use shrimp paste), red pepper flakes, and chili garlic paste.
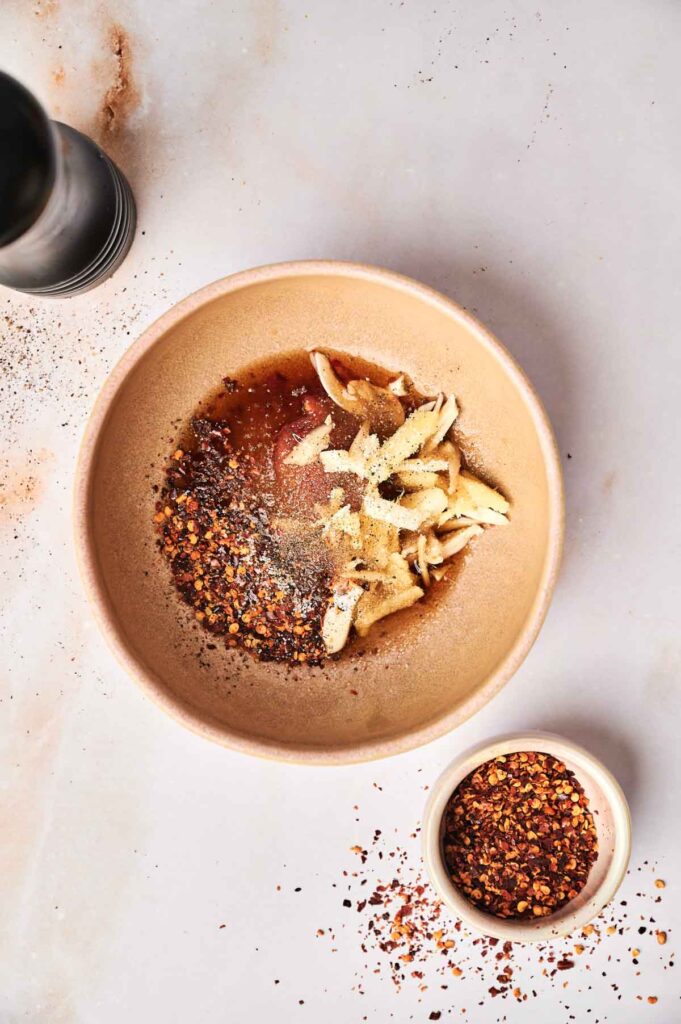
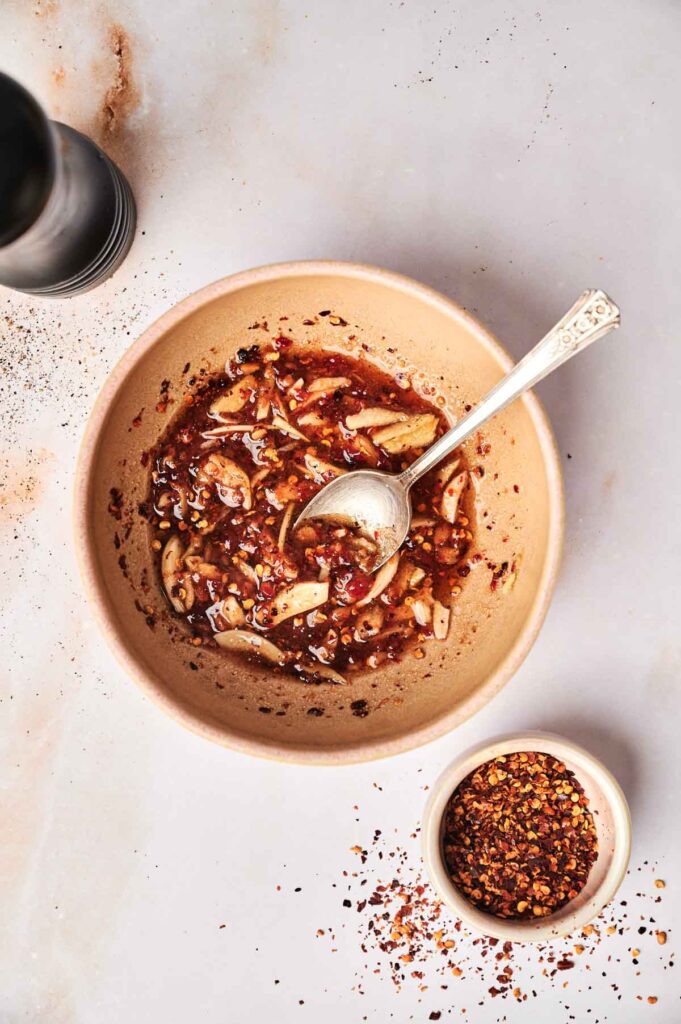
This mix brings heat, umami, and a touch of sweetness—it’s what gives your kimchi that bold flavor.
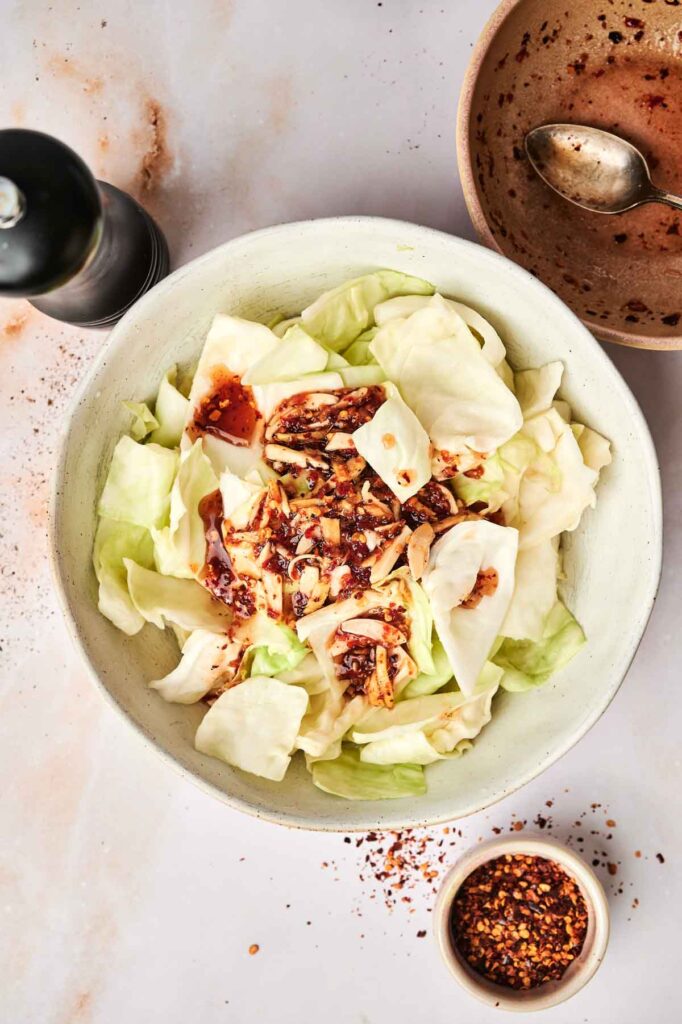
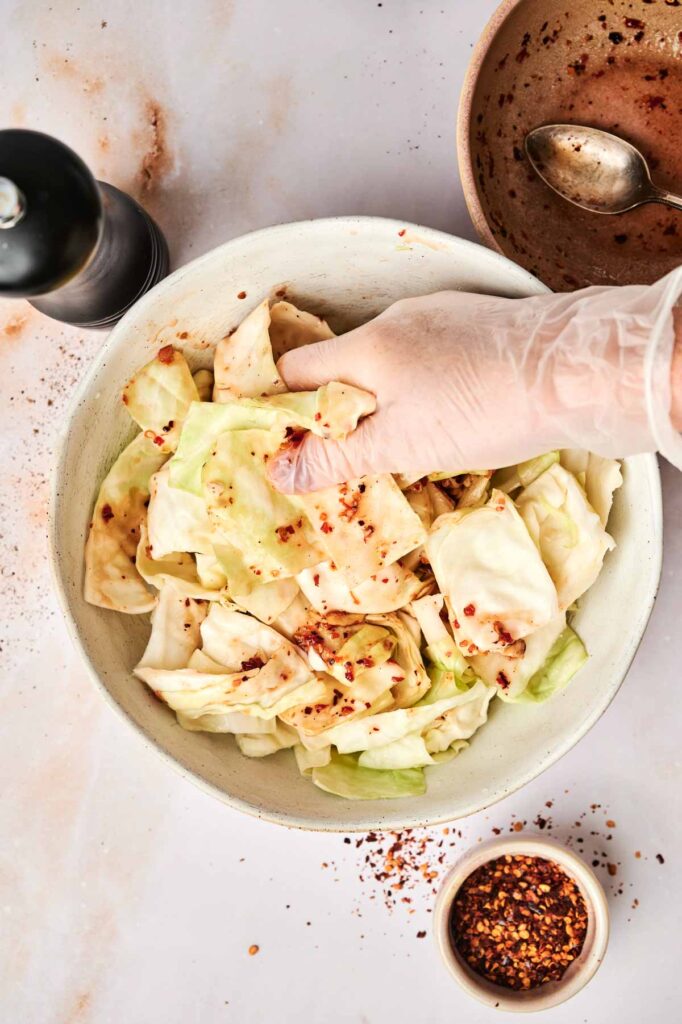
Mix the Cabbage with the Paste
Drain any liquid that’s been released from the cabbage. Add the cabbage to a large bowl and mix it with the spice paste until all the leaves are coated evenly.
The best way to do it is with your hands; just don’t forget to wear gloves because the spices will sting!
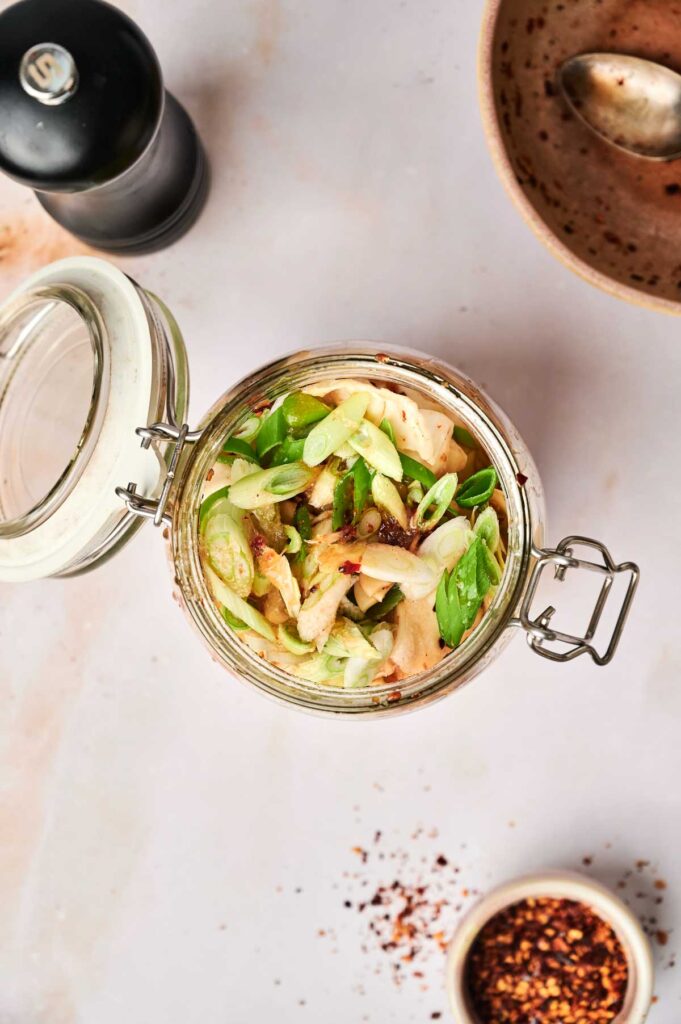
Pack the cabbage mixture tightly into a mason jar or any airtight container. Sprinkle the chopped scallions on top before sealing—they add freshness to every bite.
Let It Ferment
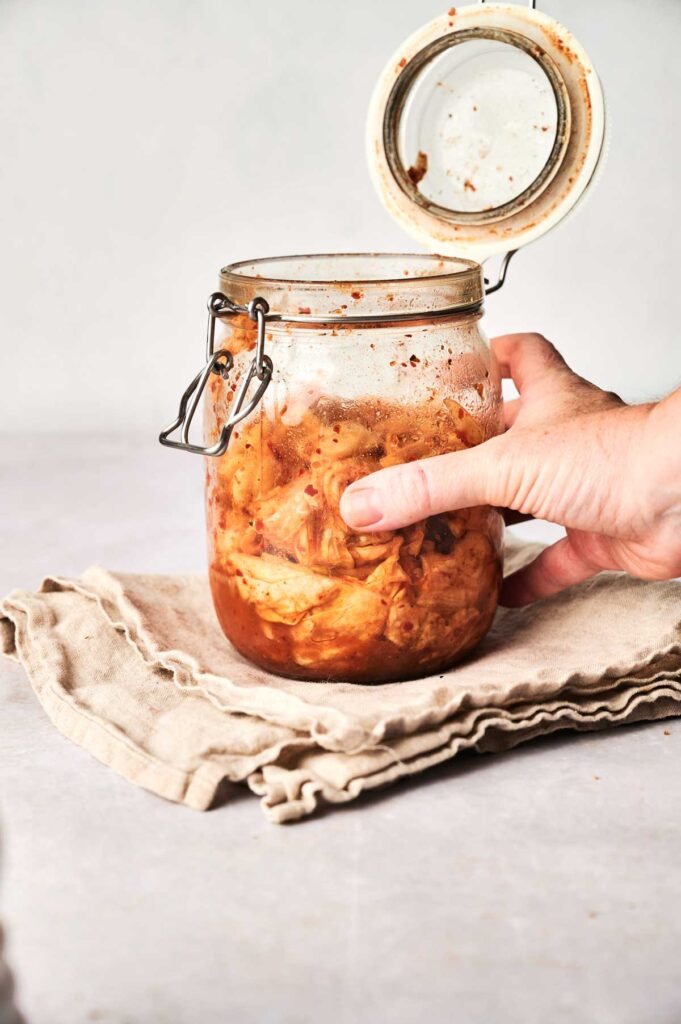
Seal the jar and set it on the counter at room temperature for about 7 days to ferment.
Place it on a small plate or dish to catch any liquid that might escape as pressure builds during fermentation—yes, even airtight containers can leak a little out of the lid when things get bubbly.

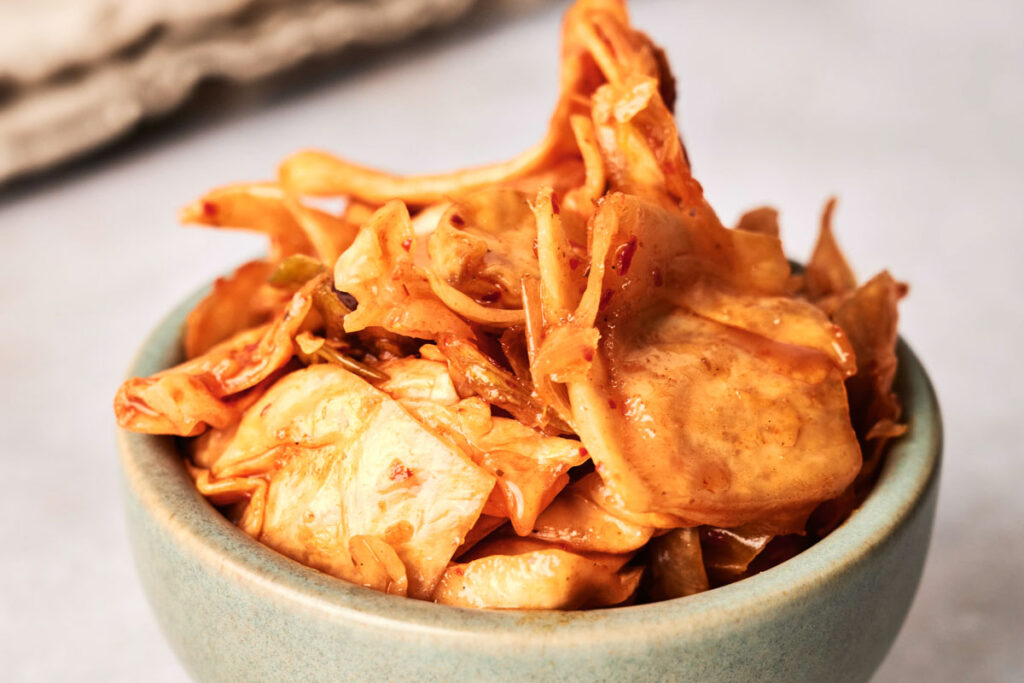
You’ll start to see tiny bubbles as the kimchi ferments—this is a good sign. After a week, move it to the fridge. The flavors will continue to develop, and it’ll be ready to serve. Finally, enjoy it as is or however you like!
Recipe Notes and Expert Tips
I’ve made this kimchi many times, and here are some helpful tips that can make the process smoother and your results even better.
- Use Coarse Salt: Go for kosher or sea salt instead of table salt. It draws moisture out more gently and won’t leave your kimchi too salty.
- Massage the Cabbage Well: Don’t skip this part—it breaks down the cabbage and helps it soak up all the flavors later on.
- Glove Up When Mixing: That chili paste is no joke on bare skin, especially if you touch your face afterward. Gloves help keep things clean and painless.
- Stick to Glass: Plastic can hold onto the smell and stain from the spices. Glass jars with tight-fitting lids work best.
- Don’t Overfill the Jar: Leave about an inch of space at the top of the jar. Kimchi expands as it ferments and can bubble over if packed too tightly.
- Use a Tray Under the Jar: During fermentation, liquid might overflow. A plate or tray will save you from cleanup duty.
- Start Tasting After 5 Days: Depending on how warm your kitchen is, it might be ready sooner. Give it a taste around day 5 and go from there.
- Chill to Stop Fermenting: Once it tastes how you like it, move it to the fridge. Cold temps slow fermentation and keep it tasting fresh longer.
How to Store Leftovers
After the initial fermentation, keep your kimchi in the fridge where it’ll stay good for up to 3-6 months. The flavor will deepen and get more tangy as time goes on, which a lot of people love.
There’s no need to freeze kimchi—refrigeration keeps it safe and tasty—but if you do, know that the cabbage may soften more once thawed.
What to Serve With Kimchi
Kimchi works as a side, a topping, or even a main ingredient in other dishes. Try it with fried rice, Korean BBQ, scrambled eggs, or tucked into grilled cheese for a spicy twist.
It’s also great added to soups and stews or paired with noodles or grain bowls if you want an extra layer of flavor.
More Easy Recipes for You to Try at Home
If you love Asian food that’s just as rich and flavorful as kimchi, I’ve put together some of my favorites, which you’ll also fall in love with.

Kimchi
Ingredients
- 1 medium head napa cabbage chopped big
- ¼ cup salt
- 3 garlic cloves sliced
- 3 tablespoons ginger sliced
- 1 tablespoon sugar
- 2 tablespoons fish sauce
- 3 tablespoons red pepper flakes
- ¼ cup chili garlic paste or other pepper Asian paste
- ½ cup scallions chopped
Instructions
- Place the cabbage in a large coriander and sprinkle with salt. Massage the cabbage with your hands to make it softer.1 medium head napa cabbage, ¼ cup salt
- Put a plate on top of the cabbage and weigh it down with something heavy, like a jar or can of beans. Let stand for 1 to 2 hours.
- In a bowl, mix the garlic, ginger, sugar, fish sauce, pepper flakes, and chili garlic paste.3 garlic cloves, 3 tablespoons ginger, 1 tablespoon sugar, 2 tablespoons fish sauce, 3 tablespoons red pepper flakes, ¼ cup chili garlic paste
- Mix the cabbage with the spices and transfer to a mason jar or other airtight containers. Top with the scallions and close it down. Let it ferment for 7 days.½ cup scallions
- After that, you can store it in the refrigerator for as long as 2 months.
Notes
- Use Coarse Salt: Go for kosher or sea salt instead of table salt. It draws moisture out more gently and won’t leave your kimchi too salty.
- Massage the Cabbage Well: Don’t skip this part—it breaks down the cabbage and helps it soak up all the flavors later on.
- Glove Up When Mixing: That chili paste is no joke on bare skin, especially if you touch your face afterward. Gloves help keep things clean and painless.
- Stick to Glass: Plastic can hold onto the smell and stain from the spices. Glass jars with tight-fitting lids work best.
- Don’t Overfill the Jar: Leave about an inch of space at the top of the jar. Kimchi expands as it ferments and can bubble over if packed too tightly.
- Use a Tray Under the Jar: During fermentation, liquid might overflow. A plate or tray will save you from cleanup duty.
- Start Tasting After 5 Days: Depending on how warm your kitchen is, it might be ready sooner. Give it a taste around day 5 and go from there.
- Chill to Stop Fermenting: Once it tastes how you like it, move it to the fridge. Cold temps slow fermentation and keep it tasting fresh longer.